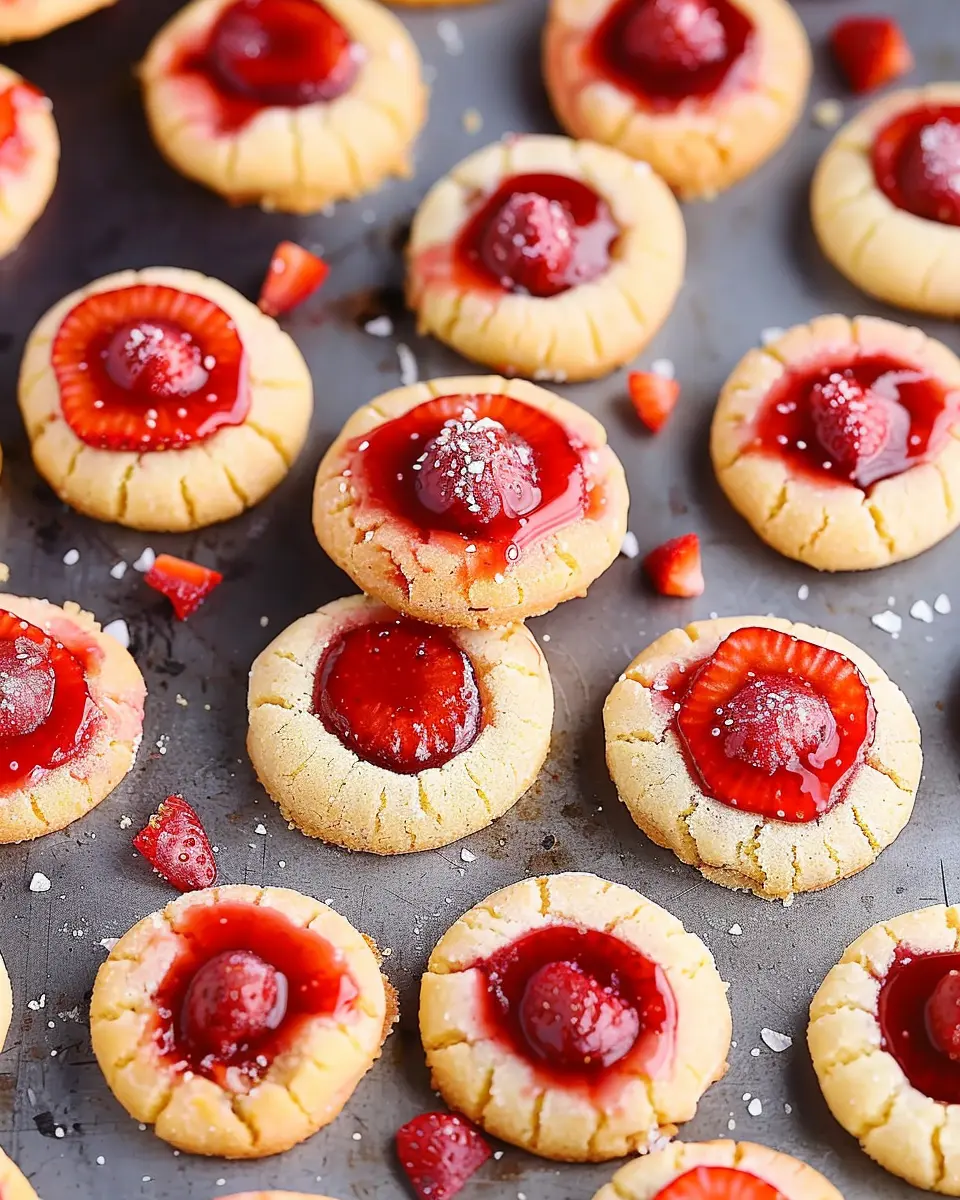
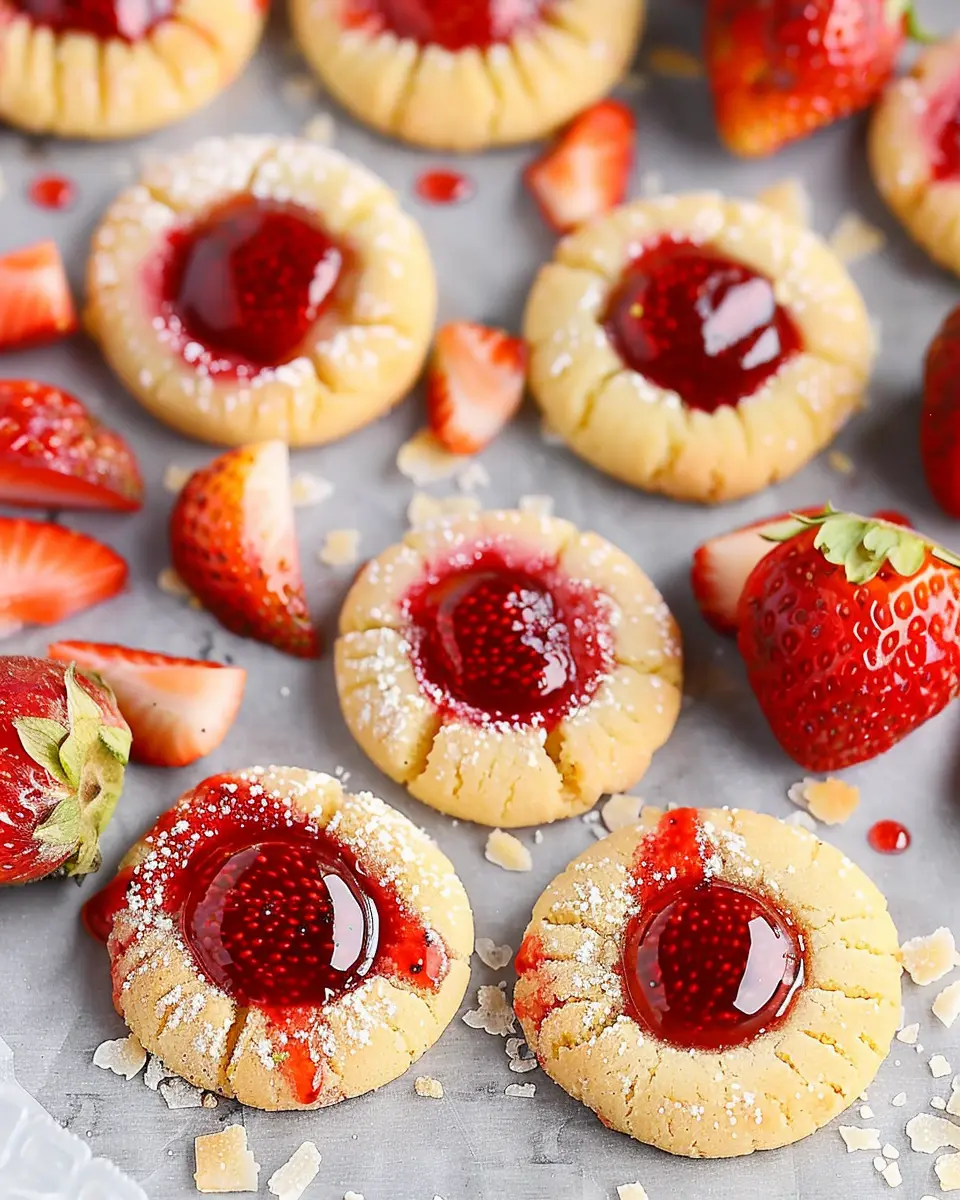
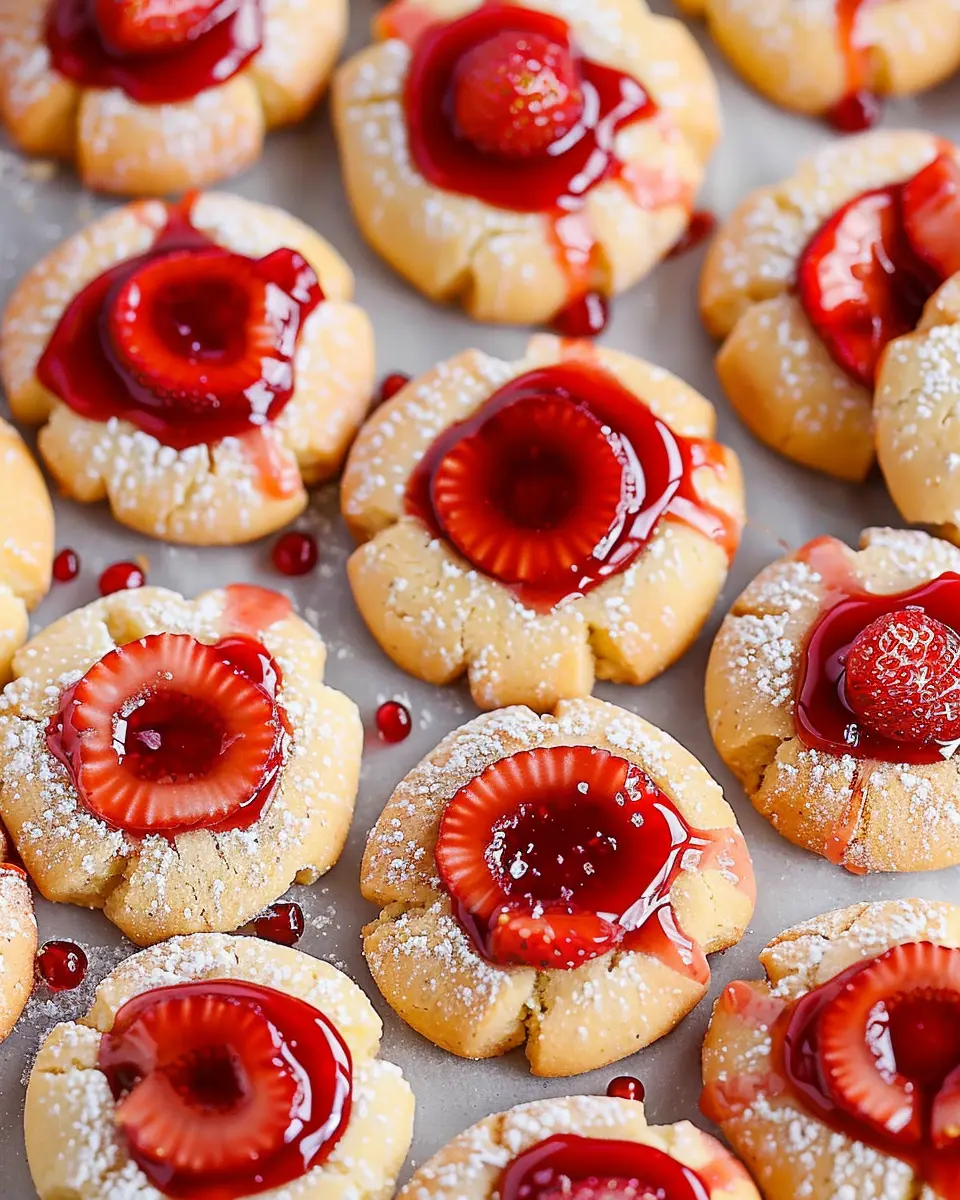
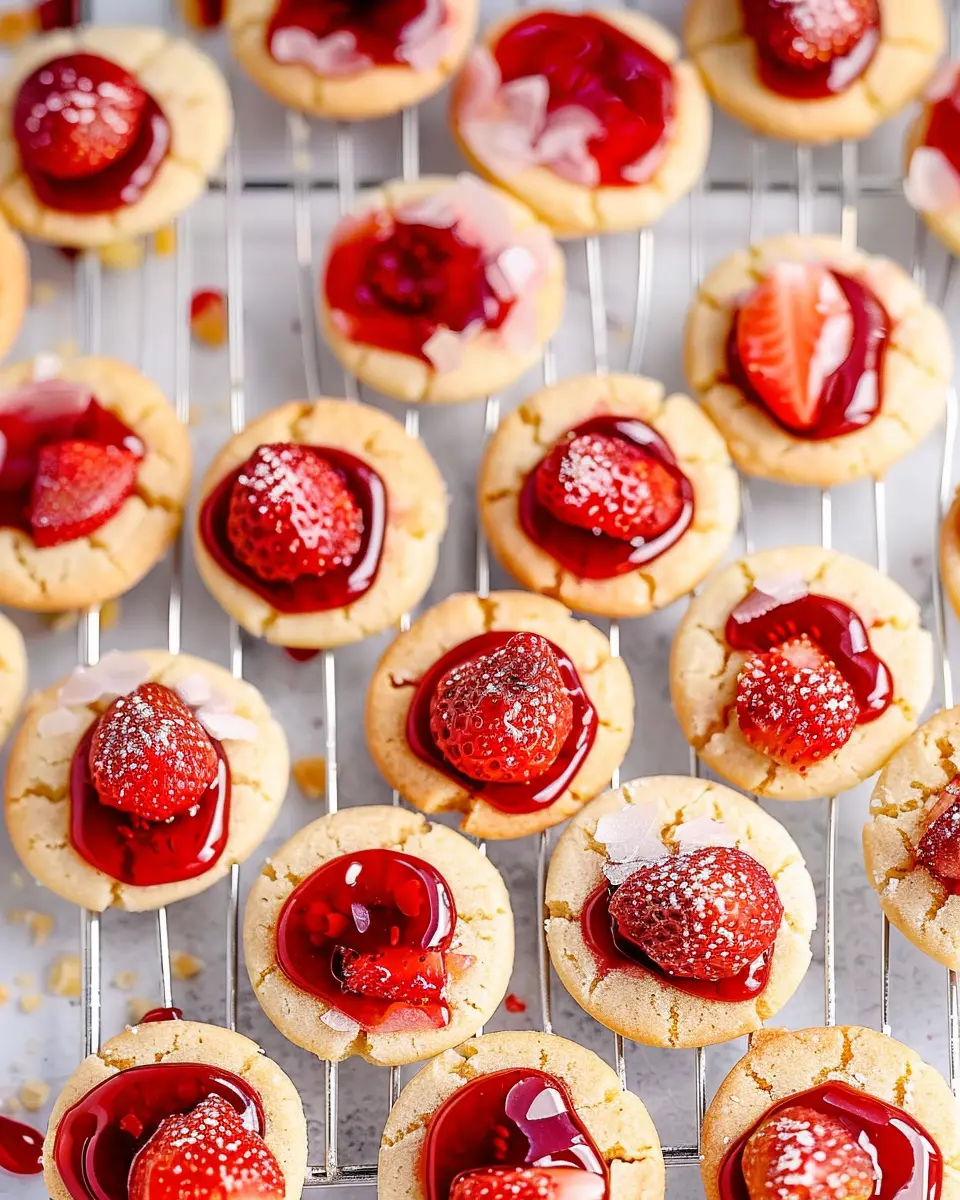
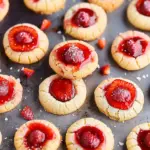
Introduction to Strawberry Thumbprint Cookies
When it comes to baking, finding that perfect blend of flavor, texture, and nostalgia is a delightful quest. Enter strawberry thumbprint cookies, a charming treat that checks all the boxes. These cookies not only bring back memories of sun-drenched summer days but also offer a versatile canvas for both novice and seasoned bakers alike. Their distinctive thumbprint, filled with sweet strawberry preserves, is just one of the reasons they have become a beloved favorite in many households.
Why Strawberry Thumbprint Cookies Are a Go-To Treat for Homemade Lovers
Strawberry thumbprint cookies are the ultimate blend of simplicity and elegance, making them a perfect project for your weekend baking plans. With just a handful of ingredients, you can whip up a batch in no time. This easy-to-follow recipe empowers you to create a homemade snack that is sure to impress your friends and family. According to a survey by the American Bakers Association, more than 70% of people believe that homemade treats evoke feelings of warmth and connection—something these cookies excel at.
Imagine gathering your loved ones together to share stories while enjoying the sweet aroma of freshly baked cookies wafting through your home. You can enhance the experience by pairing these cookies with a delicious cup of coffee or a refreshing glass of flavored sparkling water, allowing the flavors to shine even more. Their unique texture—a buttery base with a gooey fruit filling—offers a perfect contrast that makes each bite memorable.
Not only are strawberry thumbprint cookies a delightful treat, but they’re also customizable. Feel free to experiment with different fruit preserves, like raspberry or apricot, to match your tastes or the season. The versatility and ease of these cookies make them suitable for everything from casual get-togethers to festive celebrations. With their appealing appearance and flavor, they are bound to be the centerpiece of any dessert table.
So why not roll up your sleeves and dive into your very own batch of strawberry thumbprint cookies? Your next baking adventure awaits! For more tips on elevating your homemade baked goods, check out resources from the American Baking Association.
Ingredients for Strawberry Thumbprint Cookies
Simple ingredients for flavor-packed cookies
Making strawberry thumbprint cookies is a delightful activity, and the best part is—you don’t need a ton of fancy ingredients! Here’s what you’ll require for these scrumptious treats:
- Butter: They’re best with unsalted butter for that rich, creamy texture.
- Sugar: Granulated sugar adds sweetness and helps with the cookie’s structure.
- All-purpose flour: This is the backbone of your cookies, giving them that classic chewy texture.
- Egg yolk: Just one adds richness and helps bind everything together.
- Vanilla extract: A splash of vanilla elevates the flavor, making your cookies smell divine.
- Strawberry jam: Choose your favorite brand or homemade for the thumbprint filling—this is where the magic happens!
If you’re curious about where to find quality ingredients, organic options from sites like Thrive Market can enhance your baking experience. So, gather these simple ingredients, and let’s create some mouthwatering strawberry thumbprint cookies together!
Preparing Strawberry Thumbprint Cookies
Making strawberry thumbprint cookies at home is not only a fun culinary adventure but also a delightful treat that impresses friends and family alike. Let’s walk through the process step-by-step.
Make the Strawberry Jam
The first step in our journey to deliciousness is preparing the strawberry jam. Making it from scratch allows you to control the sweetness and enjoy incredibly fresh flavors:
- Ingredients:
- 2 cups fresh strawberries, hulled and diced
- 1 cup granulated sugar
- 1 tablespoon lemon juice
- In a medium saucepan, combine the strawberries and sugar. Stir well, allowing the sugar to begin to draw out the juices from the berries.
- Add the lemon juice, which not only enhances the flavor but also acts as a natural preservative.
- Cook the mix over medium heat, stirring occasionally, until it reaches a gentle boil. You’ll want to let it simmer for about 15-20 minutes, stirring frequently to prevent burning.
- Once the mix has thickened to your desired consistency, remove it from heat and let it cool. You can store any leftover jam in a jar in the fridge for future delight.
Not only does homemade jam elevate the flavor of your strawberry thumbprint cookies, but it also gives you the opportunity to experiment with different fruits! If you’re curious to learn more about homemade jams, check out this guide from BBC Good Food.
Prepare the Cookie Dough
Next up is the cookie dough. Fluffy and buttery, this is what your thumbprint cookies will be built on.
- Ingredients:
- 1 cup unsalted butter, softened
- ½ cup granulated sugar
- ½ cup powdered sugar
- 1 teaspoon vanilla extract
- 2 ¼ cups all-purpose flour
- 1 teaspoon salt
- In a large mixing bowl, beat the softened butter, granulated sugar, and powdered sugar until light and fluffy. This usually takes about 2-3 minutes.
- Mix in the vanilla extract. The aroma will already transport you to cookie heaven!
- Gradually add the flour and salt, mixing just until combined. Be careful not to over-mix as it can make the cookies tough.
Form the Cookies and Create Thumbprints
Now comes the fun part!
- Preheat your oven to 350°F (175°C).
- Use a cookie scoop or your hands to portion out about 1-inch balls of dough and roll them into smooth spheres. Place them on a parchment-lined baking sheet, leaving space between each ball.
- Using your thumb (or the back of a spoon), create an imprint in the center of each ball. This is where all that delicious strawberry jam will go!
Fill with Jam and Bake
It’s almost time to indulge!
- Spoon about a half-teaspoon of your homemade strawberry jam into each thumbprint. Don’t overfill; just a small dollop will do.
- Bake the cookies in your preheated oven for 12-15 minutes or until the edges are lightly golden.
Cool and Enjoy!
Once baked, remove the strawberry thumbprint cookies from the oven. Let them cool on the baking sheet for a couple of minutes before transferring them to a wire rack.
Letting them cool allows the jam to set, so when you bite into the cookies, you’ll experience the perfect combination of soft, buttery cookie and sweet, tangy jam.
As you gather your friends or family around to enjoy these delightful cookies, don’t forget to share a bit of the magic you created in the kitchen. These thumbprint cookies not only taste heavenly, but they also create warm memories that are sweet to savor!
Variations on Strawberry Thumbprint Cookies
Classic Strawberry Thumbprints with a Twist
While the classic strawberry thumbprint cookies are undeniably delicious, don’t hesitate to experiment! One delightful twist is to incorporate spices into the dough. Adding a pinch of cinnamon or even cardamom can elevate the flavor profile and add warmth to each bite. Imagine sinking your teeth into a buttery cookie with a subtle, unexpected zest that surprises you with every mouthful.
Another enjoyable variation involves adding a touch of citrus zest, like lemon or orange, to your dough. This not only enhances the overall taste but also pairs beautifully with the strawberry jam, creating a refreshing balance and brightness.
Swap the Jam for Other Fruit Flavors
Why limit yourself to just strawberry? Using different preserves can open up a myriad of flavor combinations. Try raspberry or apricot for a tangy contrast, or go classic with blueberry for a delightful take on a fan favorite. Each choice brings its own unique twist and adds a pop of color to your cookie platter.
You can even make your own fruit fillings! A homemade peach or cherry jam can bring an artisanal feel to your strawberry thumbprint cookies while allowing you to customize the sweetness to your liking. Plus, making jam is a fun kitchen project that lets you connect with the vibrant world of fruit preservation.
So grab some fresh fruits and let your creativity flourish! Explore these variations and make your own delicious mark on this classic cookie. Happy baking, and don’t forget to share your tasty results! For more inspiration, check out Food52’s guide on making homemade jam.
Baking notes for Strawberry Thumbprint Cookies
Tips for success in your cookie baking journey
Baking strawberry thumbprint cookies can be a delightful, rewarding experience. Here are a few tips to ensure your baking adventure goes smoothly:
-
Room Temperature Ingredients: Make sure your butter and eggs are at room temperature. This helps create a creamy batter that results in perfectly textured cookies.
-
Don’t Skip Chilling: Allow the dough to chill for at least 30 minutes before baking. This prevents the cookies from spreading too much and helps maintain that signature thumbprint shape.
-
Quality Jam Matters: Choose a high-quality strawberry jam for the filling. Fresh or homemade options can elevate the cookie’s flavor significantly. You know how a good jam can change your breakfast routine? The same applies here!
-
Experiment with Flavors: While traditional strawberry is delightful, consider trying other jams like raspberry or apricot for a fun twist.
For more tips on cookie baking, check out King Arthur Baking. They provide excellent resources for cookie enthusiasts! Happy baking!
Serving suggestions for Strawberry Thumbprint Cookies
Best ways to enjoy and serve these delightful cookies
When it comes to enjoying your strawberry thumbprint cookies, the possibilities are truly endless! For a cozy evening, serve them warm with a steaming cup of herbal tea or coffee. The contrasting temperatures of the cookies and beverage create a delightful experience for your taste buds.
For a more festive touch, consider adding a drizzle of white chocolate over each cookie. This not only enhances the sweetness but also adds an elegant flair suitable for gatherings or dessert tables.
Looking to impress your friends at brunch? Pair these cookies with a creamy yogurt or fresh cottage cheese, topped with sliced strawberries. This combination is not only delicious but also a refreshing way to start the day.
Finally, if you’re feeling adventurous, try incorporating these cookies into a dessert charcuterie board alongside fresh fruits, nuts, and cheese. The mix of flavors and textures will leave everyone wanting more!
For more serving ideas, you might enjoy checking out articles on gourmet dessert pairings on sites like Food Network and BBC Good Food.
Tips for Making Perfect Strawberry Thumbprint Cookies
Common pitfalls and how to avoid them
When preparing strawberry thumbprint cookies, there are a few common pitfalls that can derail your cookie-baking adventure. Let’s make sure that doesn’t happen!
-
Don’t Overmix the Dough: It can be tempting to want to get all the lumps out of your cookie dough, but overmixing can lead to tough cookies. Mix until just combined for a soft, melt-in-your-mouth texture.
-
Chilling Is Key: After mixing, refrigerate the dough for at least 30 minutes. This step helps the cookies hold their shape while baking and gives you that lovely, chewy texture. Consider chilling overnight if you have time!
-
Perfect Indentation: When you’re making the thumbprints, don’t press too hard. A gentle press is all you need to create a cozy little well for the strawberry jam. If you go too deep, the cookie can break apart.
-
Jam Matters: Choose high-quality strawberry jam for the best flavor. You want that sweet, fruity pop to complement the buttery cookie. For tips on selecting the best jam, check out Serious Eats.
Every bake is a learning experience, so don’t get discouraged if they don’t come out perfectly the first time! Happy baking!
Time details for Strawberry Thumbprint Cookies
When craving a sweet treat, knowing the timing of your baking process can be incredibly helpful. Here’s a quick breakdown for your strawberry thumbprint cookies adventure:
Preparation time
Getting the ingredients together and mixing up the dough will take about 15-20 minutes. Make sure you have everything you need, including your favorite strawberry jam!
Baking time
Pop those cookie trays into the oven for around 12-15 minutes. Keep an eye on them; you want them to be lightly golden.
Total time
In just about 30-35 minutes, you’ll have delicious strawberry thumbprint cookies ready to enjoy. Perfect for a gathering or just a cozy evening at home!
If you’re interested in learning more about baking key cookies, check out The Spruce Eats for tips on various techniques and flavors. Dive into the delightful world of baking and let your creativity shine!
Nutritional Information for Strawberry Thumbprint Cookies
When indulging in delicious strawberry thumbprint cookies, it’s wise to keep an eye on nutritional content. Here’s a quick look at what’s inside each cookie:
Calories
On average, each strawberry thumbprint cookie contains approximately 100 calories. This makes them a sweet treat that’s easier to fit into your daily caloric goals, whether you’re enjoying them with a cup of tea or as a midday snack.
Protein
You’ll find about 1 gram of protein per cookie. While they won’t cover your daily protein needs, they do add a little boost, especially if you enjoy them alongside a protein-rich beverage like a smoothie.
Sodium
These cookies are low in sodium, typically containing around 60 milligrams each. This makes them a heart-friendly dessert option, perfect if you’re watching your salt intake.
By keeping track of these numbers, you can savor every bite of your strawberry thumbprint cookies while still feeling great about your snack choices! For more tips on healthy eating, check out resources like Healthline or Nutrition.gov.
FAQs about Strawberry Thumbprint Cookies
Can I use frozen strawberries for the jam?
Absolutely! Using frozen strawberries is a fantastic option for making the jam for your strawberry thumbprint cookies. Just make sure to thaw them first and drain any excess liquid. This helps to achieve that thick, spreadable consistency you want. If you’re short on time, store-bought strawberry jam is also a great alternative. You can find many natural varieties at your local grocery store.
What other fillings can I use for thumbprint cookies?
While strawberry jam is a classic choice, feel free to get creative with your thumbprint cookies fillings! Here are a few options to consider:
- Raspberry jam: Tart and flavorful for a zingy twist.
- Peanut butter: For a nutty touch that pairs wonderfully with the buttery cookie.
- Chocolate ganache: Rich and indulgent, perfect for chocolate lovers.
- Lemon curd: Bright and zesty, adding a refreshing flair.
The possibilities are endless, so experiment with your favorites!
How do I store leftover cookies?
To keep your strawberry thumbprint cookies fresh, store them in an airtight container at room temperature. They’ll typically last for about 3–5 days. If you want to extend their shelf life, consider freezing them. Place the cookies in a single layer on a baking sheet to freeze until solid, then transfer them to a freezer-safe bag. When you’re ready to enjoy, simply thaw them at room temperature.
If you have any more questions about baking or want to dive deeper into the world of cookies, check out resources like the New York Times Cooking or Serious Eats for tips and inspiration!
Conclusion on Strawberry Thumbprint Cookies
A heartfelt wrap-up on why you need to make these cookies today!
Strawberry thumbprint cookies are not just a treat; they’re a delightful way to bring a little joy into your day. Imagine sinking your teeth into a buttery cookie filled with sweet, tangy strawberry goodness. They’re perfect for sharing with friends over coffee or for adding a touch of love to any gathering. Plus, they’re incredibly easy to make—perfect for busy young professionals!
Don’t wait any longer; whip up a batch, treat yourself, and enjoy that homemade charm. Your taste buds will thank you, and I guarantee they’ll become a go-to recipe. For more baking inspiration, check out King Arthur Baking and explore new flavor combinations!
PrintStrawberry Thumbprint Cookies: The Best Easy Treat to Make at Home
Delicious strawberry thumbprint cookies that are easy to make and perfect for any occasion.
- Prep Time: 15 minutes
- Cook Time: 15 minutes
- Total Time: 30 minutes
- Yield: 24 cookies
- Category: Dessert
- Method: Baking
- Cuisine: American
- Diet: Vegetarian
Ingredients
- 1 cup unsalted butter
- 1 cup granulated sugar
- 2 cups all-purpose flour
- 1/2 teaspoon salt
- 1 teaspoon vanilla extract
- 1 cup strawberry jam
Instructions
- Preheat the oven to 350°F (175°C).
- In a bowl, cream together the butter and sugar until light and fluffy.
- Add the flour, salt, and vanilla extract, mixing until combined.
- Shape the dough into balls and place them on a baking sheet.
- Make a small indent in the center of each cookie and fill with strawberry jam.
- Bake for 12-15 minutes or until golden brown.
- Allow to cool before serving.
Notes
- For a fun twist, try using different flavors of jam.
Nutrition
- Serving Size: 2 cookies
- Calories: 150
- Sugar: 10g
- Sodium: 100mg
- Fat: 8g
- Saturated Fat: 5g
- Unsaturated Fat: 3g
- Trans Fat: 0g
- Carbohydrates: 20g
- Fiber: 1g
- Protein: 2g
- Cholesterol: 30mg