Handmade Sub Rolls: A Scrumptious Guide
What makes handmade sub rolls the ultimate choice for homemade sandwiches?
When it comes to making mouthwatering sandwiches, handmade sub rolls are simply unbeatable. There’s something truly special about sinking your teeth into a roll that you crafted with your own hands. Unlike store-bought options, handmade sub rolls allow you to control every ingredient, ensuring freshness and quality. Here’s why they should be your go-to for lunch or dinner.
- Customization: With handmade sub rolls, you can adjust the size, shape, and flavor to perfectly fit your filling. Whether you’re going with a classic turkey bacon and avocado or a vegetarian option, you have full control over your creation.
- Freshness: There’s nothing quite like the smell of freshly baked bread wafting through your kitchen. According to the Bread Bakers Guild of America, fresh bread not only boosts the flavor of any dish but also improves texture. It’s a culinary experience that no pre-packaged roll can replicate.
- Texture: When you make your handmade sub rolls, you can experiment with different flours and hydration levels, achieving that ideal crispy crust paired with a soft, chewy interior. This perfect combination elevates your sandwich to gourmet status.
- Nutritional Value: By making your own rolls, you can ditch the preservatives and unwanted additives often found in store-bought varieties. Instead, you have the power to include whole grains or alternative flours, making your meal healthier.
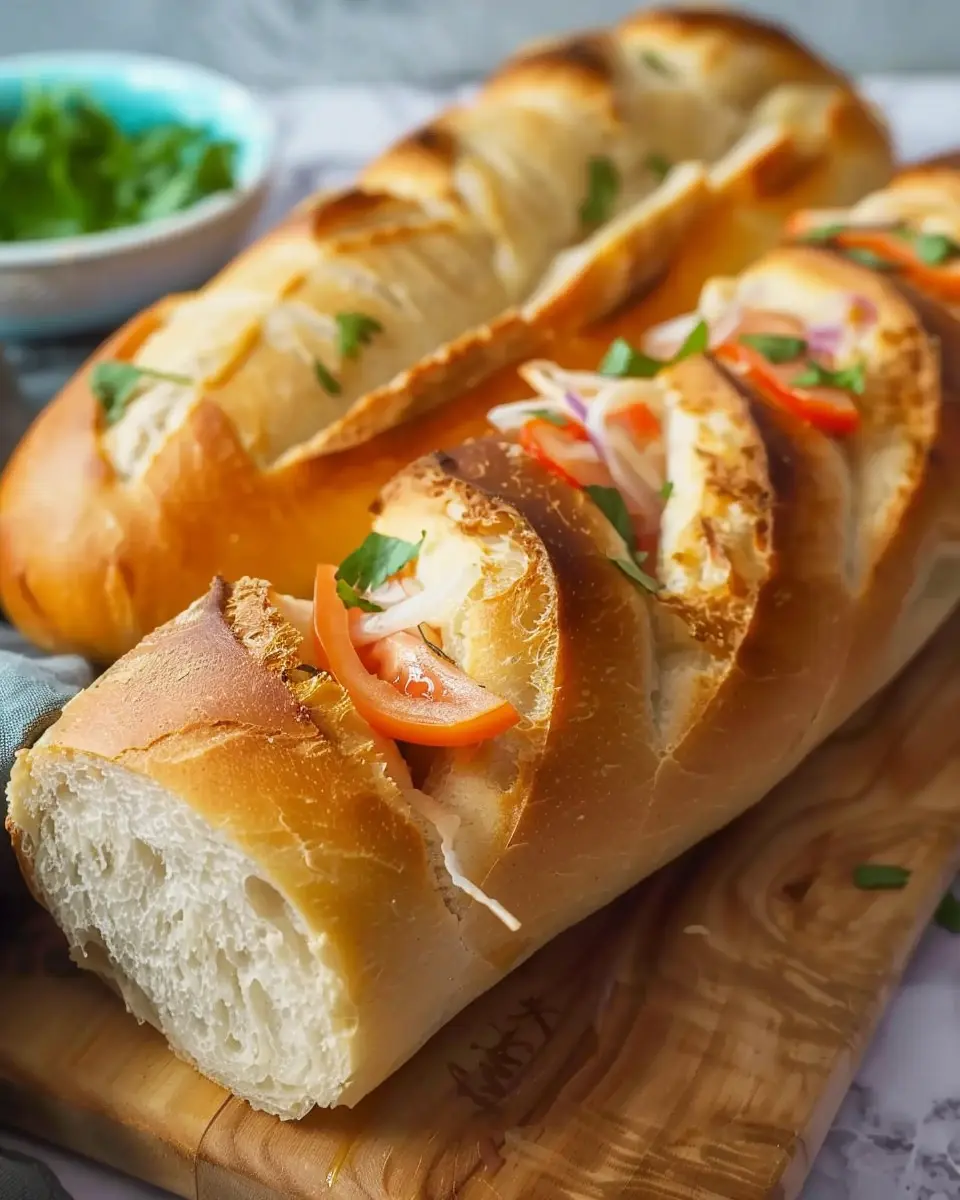
Imagine stuffing your handmade sub roll with layers of fresh ingredients, like slices of chicken ham, crisp lettuce, and ripe tomatoes, all served on that delightful roll you just baked. It creates not just a meal but a memorable moment. Feeling inspired? If you’re ready to try it out, make sure to check out this comprehensive guide on creating amazing subs.
In conclusion, there’s no debunking the allure of handmade sub rolls. With their freshness, customizability, and texture, they stand out as the perfect foundation for any sandwich you can imagine. So roll up your sleeves and get baking; delicious subs await!

Ingredients for Handmade Sub Rolls
Creating your own Handmade Sub Rolls from scratch is not only rewarding but also allows you to customize your bread to perfection. Let’s dive into the essential ingredients you’ll need to whip up these delicious rolls:
- All-Purpose Flour: This is your base. You’ll want about 4 cups for a good structure and texture.
- Water: Approximately 1 and ½ cups of warm water helps activate the yeast.
- Yeast: Using around 2 teaspoons of active dry yeast will give your rolls that lovely rise.
- Sugar: A teaspoon of sugar feeds the yeast and enhances flavor.
- Salt: Essential for seasoning, include a teaspoon for taste.
- Olive Oil: About 2 tablespoons will add moisture and a hint of richness to your rolls.
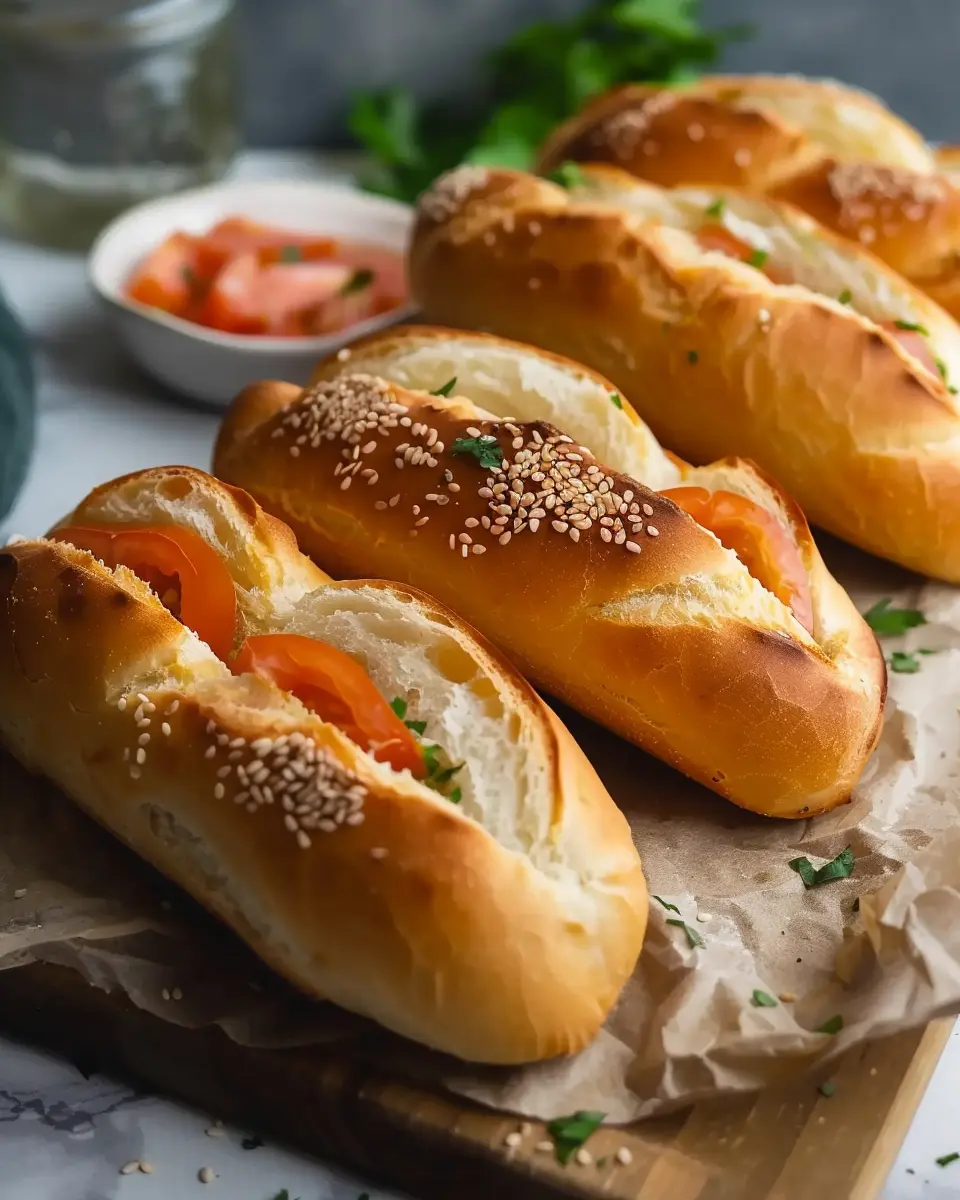
- Optional Seeds or Herbs: Think sesame or poppy seeds for a bit of crunch or oregano for flavor.
For an extra twist, consider adding a touch of garlic powder or dried Italian herbs. You’ll be amazed by how these simple ingredients can come together! If you’re curious about the science behind yeast and baking, check out this detailed article from King Arthur Baking.
Are you ready to turn these ingredients into delicious Handmade Sub Rolls? Let’s move on to the next steps!
Preparing Handmade Sub Rolls
Making your own handmade sub rolls can feel like a daunting task, but with the right guidance, it’s a fun and rewarding culinary project. Let’s walk through the steps together in a friendly, straightforward manner so you can impress friends and family with your homemade goodness!
Step 1: Gather Your Ingredients
Before diving into the world of baking, it’s essential to gather all your ingredients. Here’s what you’ll need:
- Flour: Use high-quality all-purpose flour for the best results.
- Yeast: Active dry yeast is prefered for this recipe.
- Warm Water: To activate the yeast, think around 110°F (not too hot!).
- Sugar: A touch of sugar feeds the yeast and enhances flavor.
- Salt: Balance your flavors with a good sea salt.
- Olive Oil: For that rich flavor and nice texture.
Once you have everything ready, you are prepared to start this exciting adventure. Remember, baking is a perfect opportunity to practice mindfulness—take a deep breath and enjoy the process!
Step 2: Activate the Yeast
Activating the yeast is crucial. Mix your warm water, sugar, and yeast in a bowl, giving it a gentle stir. Let it sit for about 5-10 minutes until it becomes frothy. This step ensures your handmade sub rolls will rise perfectly, making them light and fluffy.
Step 3: Mix the Dough
In a large mixing bowl, combine the flour and salt. Once your yeast mixture is ready, pour it in along with the olive oil. Use a wooden spoon to bring the mixture together. You’ll start to see your dough take shape, and that’s when the excitement begins!
Step 4: Knead Until Smooth
Now that your dough is mixed, it’s time to knead! Transfer the dough to a floured surface and use your hands to knead it for about 8-10 minutes. You want it to be smooth and elastic. If you have a stand mixer, you can use the dough hook attachment on low speed for about 5-6 minutes, which saves a bit of effort.
Step 5: First Rise
Place your kneaded dough in a lightly oiled bowl, cover it with a clean kitchen towel, and let it rise in a warm area. It should take about an hour until it doubles in size. This first rise is vital for flavor development—don’t rush it!
Step 6: Divide and Shape the Dough
Once your dough has risen, gently punch it down to release air. Divide it into equal pieces (about 6-8 depending on your desired roll size). Shape each piece into an oval loaf—this is what will become your handmade sub rolls.
Step 7: Second Rise
Place the shaped rolls on a baking sheet lined with parchment paper. Cover them with a towel again and let them rise for another 30-45 minutes. This second rise is what truly gives your rolls that airy texture.
Step 8: Prepare for Baking
While your handmade sub rolls are rising, preheat your oven to 375°F. This is also a great time to prepare an egg wash if you want a beautiful golden crust. Just whisk an egg with a splash of milk and brush it on top before baking.
Step 9: Bake to Perfection
Finally, when your rolls have puffed up nicely, it’s time for the oven! Bake them for about 20-25 minutes or until they are golden brown. The aroma will fill your kitchen, making it hard to wait.
Conclusion
And there you have it! With these steps, you can confidently create delicious handmade sub rolls right from your home. Perfect for stuffing with turkey bacon, chicken ham, or any fillings you love. Dive into the world of bread-making and enjoy the pride that comes with creating something so tasty. Happy baking!
If you want to explore more about yeast and bread-making nuances, King Arthur Baking is an excellent resource!
Variations on Handmade Sub Rolls
Handmade Sub Rolls are versatile and can easily be adapted to suit various tastes. Whether you’re looking for something classic or with a twist, these variations will inspire you to take your sub game to the next level.
Garlic and Herb Infused Rolls
If you’re a fan of bold flavors, try creating garlic and herb infused Handmade Sub Rolls. Simply incorporate minced garlic and your favorite herbs (like rosemary or thyme) into the dough during the mixing phase. The result? A fragrant roll that adds depth to any sandwich. These rolls pair wonderfully with hearty fillings, like roasted chicken or a veggie medley. For an added flavor boost, brush the tops with a blend of olive oil and garlic before baking.
Whole Wheat Variation
For a healthier option, you can’t go wrong with whole wheat Handmade Sub Rolls. Substitute half of the white flour with whole wheat flour for a nutty flavor and increased fiber. Not only do these rolls provide a wholesome twist, but they can also support digestive health. Plus, they hold up beautifully against fillings like turkey bacon or chicken ham. You might even find that your friends appreciate this nutritious option—they’re great for a casual lunch gathering or even a picnic.
Cheesy Sub Rolls
Who doesn’t love cheese? For a deliciously cheesy variation, mix in shredded cheese—like mozzarella or cheddar—directly into the dough. Or, sprinkle cheese on top before baking for a melty finish. These cheesy Handmade Sub Rolls are perfect for fillings like BBQ beef or a loaded veggie spread. It’s a crowd-pleaser that’s hard to resist!
Experiment with these fun variations and make your subs truly unique. For more inspiration, you can check out Creative Sub Sandwich Ideas or explore The Benefits of Whole Grains. Enjoy your culinary adventure!
Cooking Tips and Notes for Handmade Sub Rolls
Creating the perfect Handmade Sub Rolls can elevate any sandwich. Here are some helpful tips to guide your baking journey!
Use Quality Ingredients
Start with high-quality flour, yeast, and fresh herbs. A good foundation will lead to better flavor and texture. Consider trying out bread flour; its higher protein content can give your rolls a chewier bite.
Kneading Techniques
Kneading is crucial! Give your dough a good seven to ten minutes of kneading to develop gluten. You can also try the windowpane test—if you can stretch a piece of dough thin without it breaking, you’re good to go!
Perfecting Shape and Size
When shaping your rolls, keep them even. You want uniform sub rolls for consistent baking. We recommend a size of about six inches long, perfect for your favorite fillings like turkey bacon or chicken ham.
Baking Tips
Always preheat your oven! Baking on a hot surface can help create that golden crust. Placing a dish of water in the oven while baking adds humidity, giving your rolls a delightful crispy exterior.
For more tips on baking bread, check out King Arthur Baking. Happy baking!

Serving Suggestions for Handmade Sub Rolls
When it comes to serving your handmade sub rolls, the possibilities are endless! These rolls are perfect for crafting a variety of delicious sandwiches that can cater to any palate. Here are a few tasty suggestions to get you started:
Classic Sub Sandwiches
Elevate your lunch routine with a classic sub sandwich. Layer in your favorite cold cuts like chicken ham or even turkey bacon, along with fresh greens, tomatoes, and cheese. A drizzle of a zesty Italian dressing or a homemade aioli can bring it all together beautifully.
Hearty Breakfast Rolls
Consider whipping up a breakfast sub! Fill your handmade sub rolls with scrambled eggs, sautéed vegetables, and crispy turkey bacon. This hearty option will keep you fueled throughout the morning and make for an excellent brunch dish.
Veggie Delight
For a lighter option, load your rolls with roasted veggies, hummus, and a sprinkle of feta or mozzarella. This flavorful mix not only makes your meal colorful but is also a hit among plant-based diners. EatingWell suggests that incorporating more vegetables into your diet can enhance overall health.
Creative Dips
Don’t forget to serve alongside your favorite dips! A side of ranch or a spicy salsa pairs wonderfully and can transform your handmade sub rolls into a fun appetizer.
Fun fact: Personalizing your sub rolls not only enhances flavor but also allows you to cater to individual dietary preferences—making meals enjoyable for everyone! Whether for a game day gathering or a quick weeknight dinner, these serving suggestions will ensure that your handmade sub rolls shine!
Feel free to explore more ideas and combinations at Serious Eats, where culinary creativity meets mouthwatering recipes!
Tips for Mastering Handmade Sub Rolls
Making handmade sub rolls can be a delightful culinary adventure, especially when you consider how versatile and satisfying they can be. Follow these tips to ensure your rolls turn out perfectly every time!
Choose Quality Ingredients
Start with fresh, high-quality ingredients. Using organic flour and fresh yeast can make a noticeable difference in taste. Check out resources like King Arthur Baking for great ingredients and baking advice.
Kneading Matters
Kneading is crucial for developing gluten, which provides that chewy texture we adore in sub rolls. Aim for about 10 minutes of kneading until the dough is elastic. Not sure if you’ve kneaded enough? A simple test is the “windowpane” test — stretch a piece of dough until you can see light through it.
Allow for Proper Rising
Don’t rush the rising process! Letting your dough rise in a warm, draft-free area for about an hour or until doubled in size helps create air pockets that make your rolls fluffy. If it’s chilly in your kitchen, consider preheating the oven for a minute, turning it off, and placing the dough inside to rise.
Shape with Care
When shaping your handmade sub rolls, keep them uniform in size for even baking. Use a kitchen scale if you want precision — each roll should be around 4 ounces.
Experiment with Flavors
Feel free to infuse your dough with flavors like garlic or herbs for an exciting twist. Adding some sesame seeds on top before baking can bring added texture and taste.
Experiment and Enjoy
Baking is as much about creativity as it is about following recipes. Don’t shy away from adding your personal flair — from unique fillings to different toppings. Happy baking! For more tips on bread-making, check out America’s Test Kitchen.
By incorporating these tips, you’ll be well on your way to creating perfect handmade sub rolls that are sure to impress. Whether you’re filling them with turkey bacon, chicken ham, or roasted veggies, the results will be delicious!
Time breakdown for Handmade Sub Rolls
When you’re whipping up handmade sub rolls, it’s important to plan your time wisely. Here’s a quick breakdown to help you fit this delicious project into your busy schedule.
Preparation time
Getting started isn’t too time-consuming! You’ll need about 15-20 minutes for mixing and kneading the dough. Remember, the more you embrace the process, the better these rolls will turn out.
Baking time
Once your rolls are shaped, the baking will take approximately 15-20 minutes. Keep an eye on them as they transform into golden brown delights.
Total time
From start to finish, you’re looking at roughly 1 hour to 1 hour and 10 minutes. This includes rising times for the dough, which is a perfect opportunity to enjoy a cup of coffee or prepare those tasty fillings, like Turkey Bacon and Chicken Ham!
For more insights on homemade bread, you can check out resources like King Arthur Baking or BBC Good Food for tips and tricks!
Nutritional Facts for Handmade Sub Rolls
When you’re whipping up a batch of Handmade Sub Rolls, it’s not just about the taste but also understanding what you’re putting into your body. Here’s a closer look at their nutritional profile:
Calories
Each Handmade Sub Roll typically contains around 140-160 calories. This makes them a delightful choice for a quick lunch without the guilt, especially when you balance them with fresh fillings.
Protein
You’ll find about 5 grams of protein per roll. This is a great addition, particularly if you’re loading them up with turkey bacon or chicken ham. Protein helps keep you full and satisfied, making these rolls more than just a tasty vessel for your favorite fillings.
Sodium
On average, Handmade Sub Rolls have approximately 200-300 mg of sodium. While we love a bit of flavor, try to pair them with fresh vegetables or homemade spreads to keep the sodium in check. For more information on sodium intake, check out guidelines from the American Heart Association.
Incorporating Handmade Sub Rolls into your meals can be both delicious and nutritious. Whether you’re a busy professional or just looking to elevate your lunch game, these rolls are versatile enough to adapt to your taste preferences and dietary goals.
FAQs about Handmade Sub Rolls
Can I freeze handmade sub rolls?
Absolutely! Freezing your handmade sub rolls is a great way to preserve them for later use. Make sure to let them cool completely before wrapping them tightly in plastic wrap or aluminum foil. For added protection, you can place them in a freezer bag or airtight container. They can typically last for up to three months in the freezer. When you’re ready to enjoy them, just thaw them at room temperature or pop them in the oven for a few minutes to restore their fresh-baked goodness.
What sandwiches pair best with sub rolls?
While the beauty of handmade sub rolls is their versatility, some sandwiches take their deliciousness to another level. Here are some crowd-pleasers:
- Turkey Bacon Salad Sub: Crisp lettuce, ripe tomatoes, and creamy dressing pair perfectly with the heartiness of your rolls.
- Chicken Ham Delight: Add some pickles, Swiss cheese, and a touch of mustard for a classic experience.
- Beef and Cheese: Think of a philly cheese steak loaded with sautéed onions and peppers for a satisfying meal.
Feeling adventurous? You can even whip up vegetarian options with roasted vegetables or hearty beans.
How can I store leftover rolls?
To keep your leftover handmade sub rolls fresh, place them in a paper bag or airtight container at room temperature if you’ll consume them within a couple of days. For longer storage, consider refrigerating them for up to a week. Just be sure to reheat them properly before serving to bring back that delightful texture. If you’d like more tips on food storage, check out resources from the USDA’s Food Safety page.
No matter how you choose to enjoy them, handmade sub rolls will undoubtedly elevate your sandwich game!
Conclusion on Handmade Sub Rolls
Creating handmade sub rolls is not just about following a recipe; it’s an art that brings delight to your kitchen and your table. As you’ve seen, crafting these rolls allows for customization—think about filling them with Turkey Bacon, Chicken Ham, fresh veggies, and sauces of your choice. The beauty of this process lies in the joy of sharing homemade meals with your loved ones.
When you bake these rolls, you’re not just making food; you’re creating unforgettable memories. So why not give it a try? Check out this guide on baking basics to hone your skills and get inspired. Remember, the best moments are often made at home, one handmade sub roll at a time.
PrintHandmade Sub Rolls: The Best Turkey Bacon and Chicken Ham Delight

A delightful recipe for handmade sub rolls filled with turkey bacon and chicken ham.
- Prep Time: 20 minutes
- Cook Time: 20 minutes
- Total Time: 1 hour 40 minutes
- Yield: 12 rolls
- Category: Baking
- Method: Baking
- Cuisine: American
- Diet: None
Ingredients
- 4 cups all-purpose flour
- 1 tablespoon sugar
- 1 teaspoon salt
- 1 packet instant yeast
- 1 1/2 cups warm water
- 2 tablespoons olive oil
- 8 slices turkey bacon
- 8 slices chicken ham
Instructions
- In a large bowl, combine flour, sugar, salt, and yeast.
- Add warm water and olive oil, mix until a dough forms.
- Knead the dough on a floured surface for about 10 minutes.
- Let the dough rise in a warm place for 1 hour.
- Divide dough into equal pieces and shape into rolls.
- Let rolls rise for another 30 minutes.
- Bake in preheated oven at 375°F for 15-20 minutes.
- Cool and fill with turkey bacon and chicken ham to serve.
Notes
- Use fresh ingredients for the best flavor.
- Experiment with different fillings to customize your sub rolls.
Nutrition
- Serving Size: 1 roll
- Calories: 200
- Sugar: 1g
- Sodium: 250mg
- Fat: 5g
- Saturated Fat: 1g
- Unsaturated Fat: 4g
- Trans Fat: 0g
- Carbohydrates: 35g
- Fiber: 2g
- Protein: 7g
- Cholesterol: 10mg