
Outline for Small Batch Mini Baguette Bread
When it comes to baking bread, there’s something wonderfully rewarding about creating your very own tasty loaves from scratch. In this section, we’ll walk you through the detailed outline for our Small Batch Mini Baguette Bread recipe. This guide will help you understand the process, ingredients, and tips, enabling even novice bakers to master the art of breadmaking. Whether you’re looking to impress a date or just wanting to treat yourself to a slice of warm, fresh bread, you’re in the right place.
Understanding the Basics of Baguette Bread
Before we dive into the specifics of our small batch mini baguette bread, let’s cover the key elements that make a baguette stand out. Traditional baguettes have a crispy crust and a soft, airy interior. Achieving this balance is the essence of creating your mini baguettes.
- Key Traits:
- A delicious, crispy crust
- A light and airy texture inside
- Classic shape and appearance
Baguettes are primarily made with four key ingredients: flour, water, yeast, and salt. It’s amazing how such simple elements can come together to create something so delicious! A high-protein bread flour works best because it yields a higher gluten content, which is crucial for that chewy texture we all love.
Ingredients You’ll Need
Now, let’s talk through the ingredients necessary for your small batch mini baguette bread. Here’s what you’ll want to gather before you begin:
- 2 cups of high-protein bread flour: This is essential for that perfect texture.
- ¾ cup of warm water: Warm but not boiling; about 110°F (43°C) is ideal.
- 1 teaspoon of instant yeast: The magic that helps your dough rise.
- ½ teaspoon of salt: Enhances flavor; don’t skip this one.
- Optional: A sprinkle of flour for shaping and dusting.
Did you know? According to the King Arthur Baking Company, the type of flour you choose can drastically affect the outcome of your bread. Using bread flour is key to that lovely chewy texture!
Preparing the Dough
Now that you have your ingredients ready, let’s discuss the dough preparation process.
-
Mixing: Start by combining the flour, yeast, and salt in a large mixing bowl. Gradually add the warm water while stirring until a rough dough forms.
-
Kneading: Transfer the dough to a lightly floured surface and knead for about 5 to 7 minutes, until it’s smooth and elastic. If it’s too sticky, don’t hesitate to add a bit more flour.
-
First Rise: Place the dough in a lightly greased bowl, cover it with a damp cloth or plastic wrap, and let it rise at room temperature until it doubles in size—this usually takes about 1 hour.
Shaping Your Mini Baguettes
Once your dough has risen beautifully, it’s time to shape it into those charming mini baguettes. This is where the fun really begins!
-
Dividing: Gently punch down your dough to release the air and turn it out onto a floured surface. Divide the dough into two or four equal portions depending on your desired size.
-
Shaping: For each piece, stretch it into a rectangle, then fold the top and bottom into the middle and pinch to seal. Roll it back into a log, tapering the ends to form the classic baguette shape.
-
Second Rise: Place the shaped baguettes on a parchment-lined baking sheet, cover them again, and allow them to rise for another 30-45 minutes. This gives them that final puff of air!
Baking Techniques for Perfect Mini Baguettes
Now, let’s talk about baking! This step can make or break your small batch mini baguette bread experience.
-
Preheat: Set your oven to 450°F (232°C). If you have a baking stone, place it in the oven while it preheats for extra crispiness.
-
Steam: To achieve that iconic crust, you need steam. Place a metal pan on the bottom rack of the oven and fill it with boiling water just before you put the baguettes in.
-
Baking: Bake your mini baguettes in the preheated oven for about 20-25 minutes until golden brown. They should sound hollow when tapped on the bottom.
Cool and Enjoy
Once your small batch mini baguette bread is out of the oven, let it cool on a wire rack (if you can resist the temptation). This cooling time allows the crust to set properly and the flavors to develop fully.
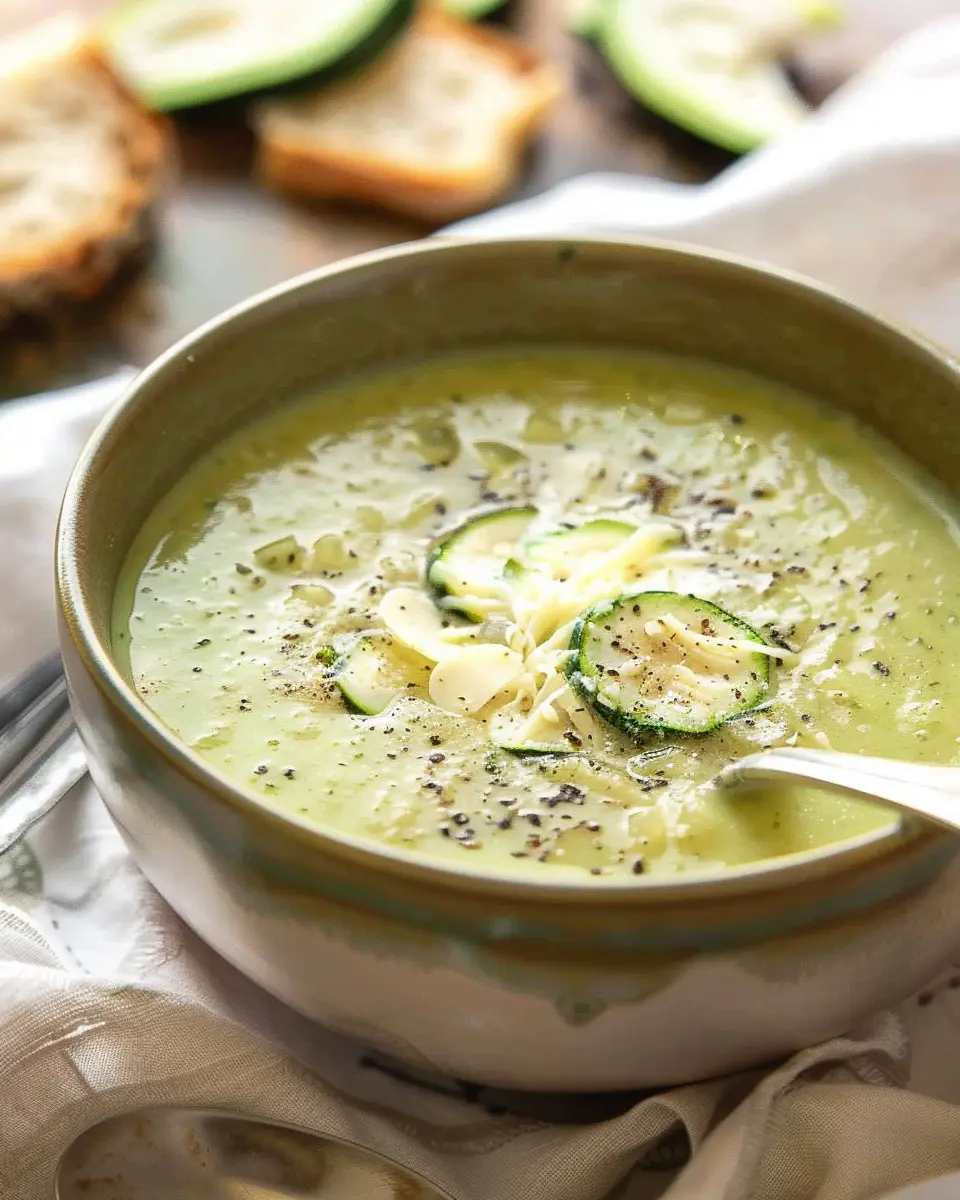
- Serving tips: Slice it up to serve with soups, enjoy with spreads like homemade garlic butter, or even make delightful turkey bacon sandwiches with slices of fresh tomatoes and leafy greens.
Troubleshooting Common Issues
Baking can occasionally be unpredictable, but don’t worry! Here are some common issues and how to solve them:
- Dough is too sticky: Add a little more flour while kneading. Remember, the right balance is crucial.
- Baguettes do not rise well: Ensure your yeast is fresh and that the dough isn’t too cold during rising.
- Crust is too hard: Experiment with the baking time and steam; less steam can lead to a softer crust.
Conclusion and Creative Serving Suggestions
In conclusion, mastering small batch mini baguette bread is definitely worth the effort. The satisfaction of pulling fresh loaves from the oven can’t be beaten. Not only do they make for a fantastic sandwich base, but they also pair beautifully with cheeses, soups, or even just a simple drizzle of olive oil.
Consider making a fun sliced baguette platter with dips like hummus or pesto. Or, serve them alongside a comforting bowl of tomato soup for a classic meal. The possibilities are endless!
As you dive into this baking adventure, remember that every loaf is a learning opportunity. Share your baking stories and tips by leaving a comment below—we’d love to hear how your mini baguettes turned out!
Happy baking, and may your kitchen always smell like fresh bread!

Introduction to Small Batch Mini Baguette Bread
The allure of homemade bread
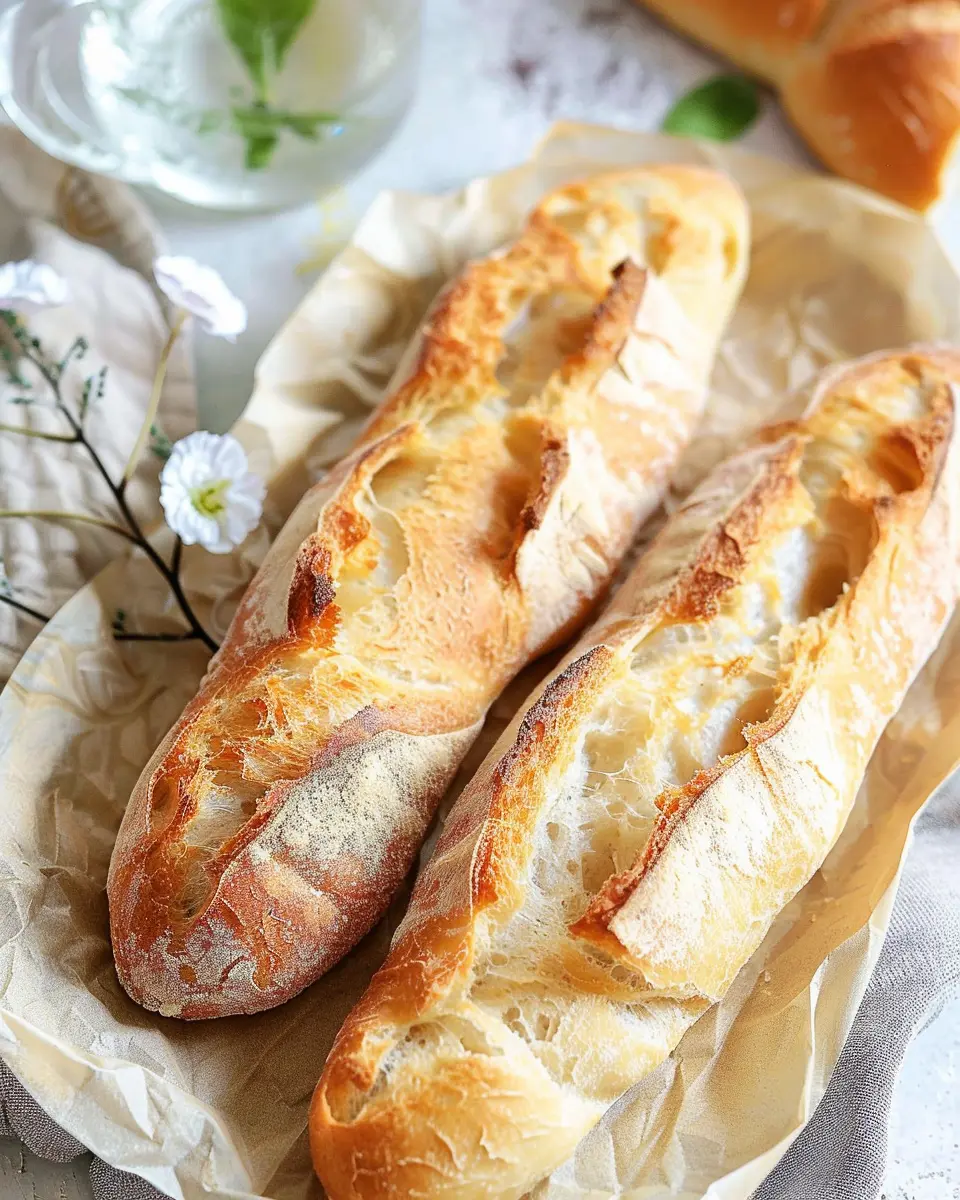
There’s something magical about the aroma of freshly baked bread wafting through your home. The soft crust, the chewy interior, and that simple yet profound satisfaction of creating something with your own hands can elevate an ordinary day. Homemade bread, especially small batch mini baguette bread, offers a personal touch that store-bought loaves simply can’t match. It’s not just about nourishment; it’s an experience that invites creativity into your kitchen. For instance, picture yourself enjoying a warm, crusty baguette with a spread of garlic butter after a long day at work—it’s a slice of heaven!
Why small batch is the way to go
Opting for a small batch means enjoying the culinary process without the daunting commitment of making a dozen loaves. Smaller amounts allow you to experiment with flavors and techniques without worrying about waste. You can tailor the dough by adding herbs, spices, or even seeds that cater to your taste. Plus, if you’re anything like me, less dough means fewer dishes, and that’s always a win!
According to the American Institute of Baking, the rise in home baking can be attributed largely to this trend of smaller, more manageable recipes. It’s all about baking just enough to satisfy cravings without filling up the freezer. Not to mention, sharing these mini baguettes with friends or family—who wouldn’t love a warm, homemade gift?
My journey in baking bread
I remember my first attempt at making bread; it was a gloriously messy affair! Flour was everywhere, the dough was less than perfect, and my kitchen resembled a disaster zone. But that initial struggle laid the foundation for a rewarding hobby. Each failed loaf taught me something new, and each success, like my small batch mini baguette bread, sparked joy and confidence.
As you embark on your baking journey, remember that it’s perfectly okay to make mistakes. The beauty of bread-making lies in its imperfections. Who knows, your kitchen could become a space not just for cooking, but for creating lasting memories. If you’d like to dive deeper into home baking, check out resources on bread techniques or join online baking communities for tips and camaraderie. Happy baking!
Ingredients for Small Batch Mini Baguette Bread
Essential ingredients you need
To create delightful small batch mini baguette bread, you’ll need:
- 1 cup all-purpose flour
- 1/3 cup warm water
- 1/4 teaspoon instant yeast
- 1/2 teaspoon salt
This simple roster allows you to whip up baguettes that are just right for quick meals or snacks!
The role of each ingredient in the dough
- All-purpose flour: The backbone of our bread, providing structure and a lovely chewy texture. You might consider using bread flour for a more robust baguette.
- Warm water: Essential for activating the yeast, it helps to create a moist environment, crucial for a good rise.
- Instant yeast: This magical ingredient leavens the bread, making it light and airy. It’s a quick-acting option suitable for home bakers.
- Salt: Not just for flavor, salt helps strengthen the dough and can slow down yeast activity, giving the bread a balanced taste.
Suggested alternatives for common ingredients
If you want to mix things up, consider these alternatives:
- Instead of all-purpose flour, try whole wheat flour for a nuttier flavor.
- If you’re short on salt, you can reduce it or use flaky sea salt for added texture.
Curious to learn more about the science of bread baking? Check out this bread baking guide for deeper insights!
Preparing Small Batch Mini Baguette Bread
Making small batch mini baguette bread at home is a delightful experience that can elevate your culinary skills, impress friends at dinner, or simply make your kitchen smell heavenly. Let’s dive into the detailed process of creating these crusty beauties!
Gather Your Tools
Before you start, it’s essential to have everything on hand. Here’s what you’ll need:
- Mixing bowl
- Measuring cups and spoons
- Dough scraper
- Baguette pan (though a baking sheet will work too)
- Parchment paper (if you’re using a baking sheet)
- Clean cloth or plastic wrap
- A sharp knife or lame for scoring
Gathering your tools in advance not only streamlines the process but also gets you excited to bake! You will feel more prepared and less rushed, which always yields better results.
Mixing the Dough
With your tools in place, let’s begin by mixing the dough for our small batch mini baguette bread. Combine the following ingredients in a mixing bowl:
- 2 cups of all-purpose flour
- 1 cup of warm water (around 110°F)
- 1 teaspoon of salt
- 1/2 teaspoon of instant yeast
Stir the mixture until a shaggy dough forms. No need for fancy mixers—using your hands is part of the fun! Knead the dough for about 5 to 7 minutes until it becomes smooth and elastic. You can check the dough’s readiness by stretching a small piece. If it holds together without breaking, you’re good to go.
The First Resting Period
Once your dough is mixed and kneaded to perfection, it’s time for its first resting period. Transfer the dough back to the bowl, cover it with a clean cloth or plastic wrap, and let it rest for about 1 hour in a warm, draft-free area. This is where the magic of fermentation begins! The yeast will start to work its wonders, creating flavor and a lovely rise.
First Set of Folds
After the dough has rested, it’s time for the first set of folds. With floured hands, gently stretch the dough into a rectangle, folding the sides in towards the middle. Turn it 90 degrees and repeat. This technique helps develop gluten, giving the bread structure. Cover it again and let it rest for another 30 minutes.
Second Resting Period and Folds
Now, for the second resting period, let’s repeat the folding process. After letting it rest for 30 minutes, perform one more set of folds. This not only builds strength but also keeps the dough airy. Give it another 30 minutes to rise.
Shaping the Baguette
Shaping can be a bit tricky but worry not—practice makes perfect! On a lightly floured surface, divide the dough into smaller pieces, about 4-5 pieces for mini baguettes. Gently flatten each piece into an oval shape, and then roll it like a jelly roll from one end to the other, tucking in the edges.
Tapering and Final Resting
For that classic baguette shape, taper the ends of each roll gently. Place your mini baguettes on the baguette pan or parchment-lined baking sheet. Cover with a cloth and let them rest for a final 30 minutes before baking. Preheat your oven to 450°F during this time.
As you prepare to bake, consider that the kitchen is often the heart of the home. The aroma of fresh bread will beckon everyone inside, creating connections around the dinner table.
Now that you’re equipped with the steps to prepare delicious small batch mini baguette bread, grab your tools and get started! If you’re curious about how to elevate your sandwiches or pair these baguettes with delightful spreads, check out this expert guide on artisan bread. Happy baking!
Baking the Small Batch Mini Baguette Bread
Baking bread at home can seem intimidating, but with the right guidance, it becomes a rewarding experience. Let’s break down the steps for creating your small batch mini baguette bread. Here’s how to bring that golden crust to life.
Preheat the Oven
Before you start mixing your ingredients, it’s crucial to preheat your oven. This step ensures a perfect bake right from the start. Set your oven to 450°F (230°C), but don’t forget to place a cast iron skillet or a baking dish at the bottom of the oven. This will allow us to generate steam, which is essential for creating that coveted crust.
As the oven heats, you can focus on shaping your dough. Make sure everything is ready because once your dough goes in, you want the oven to work its magic without interruption.
Scoring the Dough
Once your small batch mini baguette bread dough has risen beautifully, it’s time for the fun part – scoring. Using a sharp knife or a bread lame, make a few shallow slashes on top of the dough. These cuts allow for the steam to escape while the bread bakes, reducing the risk of your loaves bursting unexpectedly.
The design you make can be simple or intricate, depending on your artistic inclination. It may sound trivial, but scoring can elevate the look of your baguettes while also improving the texture. Plus, if you want some inspiration, check out tips on bread scoring techniques from expert bakers here.
Baking Process
Now that your dough is prepped and scored, let’s get baking! Carefully slide your dough into the preheated oven and pour a cup of hot water into the skillet at the bottom. The resulting steam will create a soft interior and a beautiful, crunchy crust.
Bake the mini baguettes for about 20-25 minutes or until they turn golden brown and sound hollow when tapped on the bottom. Keep an eye on them during the last few minutes to avoid over-browning. Remember, every oven is unique, so don’t hesitate to adjust your baking time as needed!
Cooling and Slicing
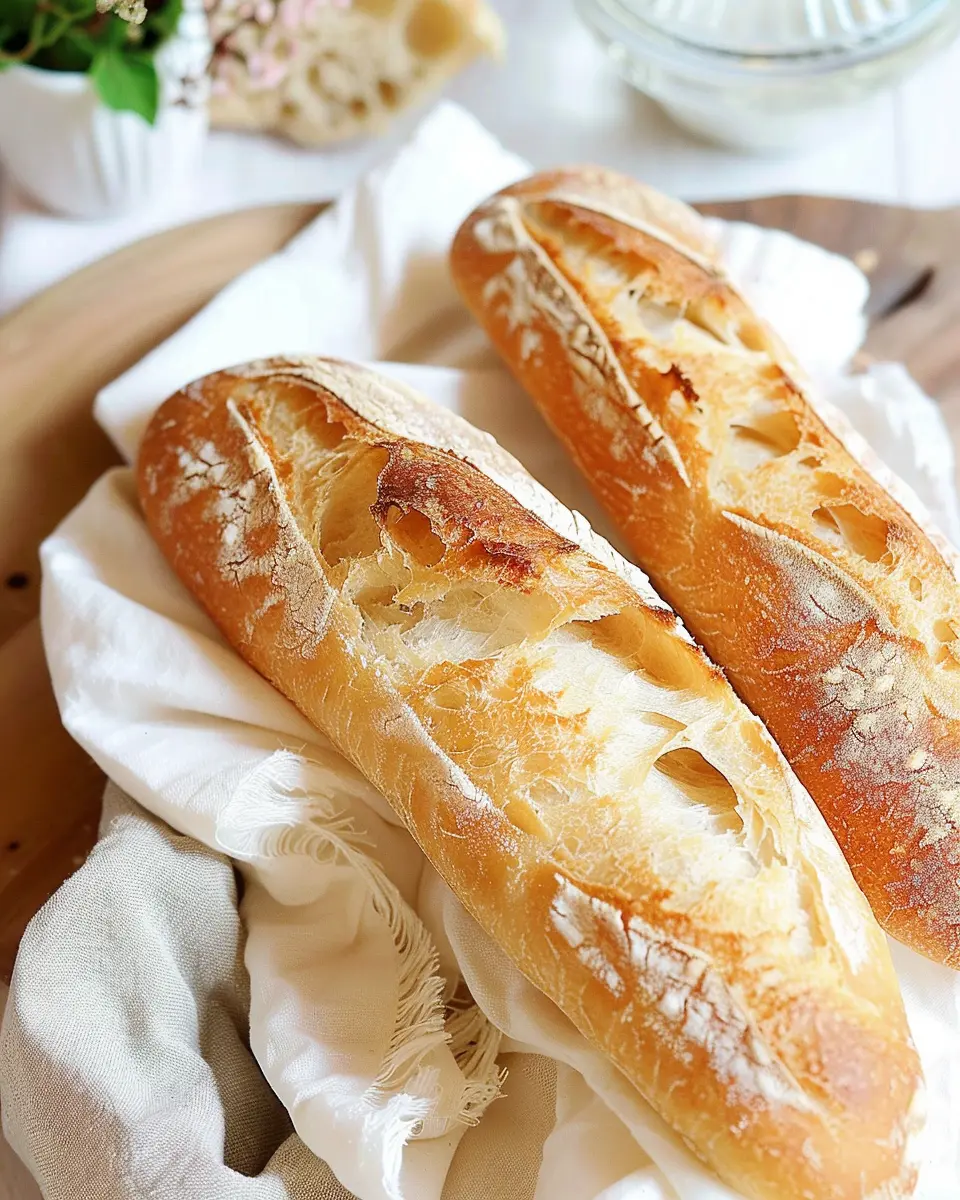
After removing your delightful small batch mini baguette bread from the oven, it’s essential to allow them to cool on a wire rack. This step helps prevent a soggy bottom, which isn’t the destiny we wish for our beautiful loaves. If you can, let them cool completely before slicing—this allows the crumb structure to set in properly.
When you finally get to that first slice, relish in the soft, airy texture inside and the satisfying crunch of the crust. Pair with some Turkey Bacon or Chicken Ham, and you’ll have a meal that feels both gourmet and comforting!
Baking your own bread doesn’t just fill your home with an incredible aroma; it also connects you to a rich tradition and a sense of accomplishment. So grab those ingredients, and let’s make some small batch mini baguette bread!
Variations on Small Batch Mini Baguette Bread
Embrace Seasonal Herbs
Transforming your small batch mini baguette bread into a taste of the season is effortless and rewarding. Incorporating fresh herbs like rosemary, thyme, or basil not only adds vibrant flavor but also aromatic appeal. Imagine slicing into a warm baguette infused with the essence of fresh garden herbs on a summer evening. Just chop the herbs finely and fold them into the dough, allowing their natural oils to meld beautifully during the baking process.
Explore Cheese and Olives for Extra Flavor
Who can resist the savory charm of cheese and olives? Adding crumbled feta or grated Parmesan will infuse your small batch mini baguette bread with a delightful richness. Alternatively, fold in some chopped olives for a burst of briny goodness. Whether you’re preparing a cozy dinner for two or hosting a casual gathering, these additions will elevate your bread to a crowd-pleasing centerpiece. When it comes to baking bread, flexibility reigns — just be cautious not to overload your dough, as it needs to rise beautifully.
Experiment with Unique Flours
Why stick to traditional all-purpose flour when you can explore a world of flavors? Whole wheat, spelt, or even chickpea flour can give your small batch mini baguette bread an intriguing twist. Each type of flour contributes its own texture and taste, so feel free to experiment! If you’re curious about the health benefits of whole grains, check out resources from the Whole Grains Council for more insight. Mixing a blend of flours can also create a more complex flavor profile that will intrigue your palate.
With these variations, your small batch mini baguette bread will be anything but ordinary. Which combination will you try first?
Cooking Tips and Notes for Small Batch Mini Baguette Bread
Tips for handling sticky dough
When making small batch mini baguette bread, you may find the dough quite sticky. This is normal! To make handling easier, try these methods:
- Flour your hands: Lightly dust your hands with flour before kneading.
- Use a bench scraper: This handy tool can help you lift and turn the dough without it sticking to your fingers.
Importance of patience during resting
Resting the dough is crucial for developing the flavor and texture of your mini baguettes. This waiting period allows the gluten to relax, creating a more manageable dough. Don’t rush the process—take your time! You’ll notice a significant difference in the final product.
According to King Arthur Baking experts, a longer fermentation period can enhance the taste and crust of your bread.
How to achieve the perfect crust
A golden, crispy crust is key to a delightful small batch mini baguette bread. Here’s how to get there:
- Steam your oven: Create steam during the first few minutes of baking by placing a tray of water in the oven.
- Use high heat: Bake at a higher temperature (around 450°F) to ensure that the crust develops beautifully.
With these tips in mind, you’re well on your way to mastering mini baguette bread! Happy baking!
Serving Suggestions for Small Batch Mini Baguette Bread
Sandwich Inspirations
When it comes to crafting the perfect sandwich with your small batch mini baguette bread, think beyond the usual. Try layering sliced turkey bacon, fresh greens, and creamy avocado for a delightful twist. Alternatively, go for a classic chicken ham and cheese combo, topped with zesty mustard. These convenient little loaves are also fantastic for sliders—perfect for hosting a casual gathering!
Great Pairings with Soups and Salads
The small batch mini baguette bread truly shines alongside warm, comforting soups. Pair it with a classic tomato bisque or a hearty vegetable soup to soak up every last drop. Toss in a crunchy salad, perhaps with roasted beet and goat cheese, and you’ll have a well-rounded meal. Consider this pairing insight from Bon Appétit for elevating your dining experience.
Creative Serving Ideas for Entertaining
Hosting friends? These mini baguettes make for a stunning appetizer. Slice them open and fill with a variety of spreads—the possibilities are endless! Think olive tapenade, goat cheese, or even a rich hummus. Serve with an assortment of fresh veggies and nuts for a beautiful charcuterie board. Plus, they’re perfect for dipping into salsa or guacamole during game nights, ensuring your gatherings are always stylish and delicious!
Time Breakdown for Small Batch Mini Baguette Bread
Preparation time
Making your own small batch mini baguette bread is an enjoyable way to spend about 30 minutes prepping the dough. You’ll knead the ingredients, shape the loaves, and let them rise while you sip your favorite coffee or tea.
Baking time
Once your dough has risen beautifully, it’s time to slide those mini baguettes into the oven. Bake them for about 20 minutes until they turn a golden brown that makes your kitchen smell heavenly.
Total time
From start to finish, you’re looking at roughly 1 hour for your homemade small batch mini baguette bread. This includes preparation, rising, and baking time. Think about how great it will feel to indulge in freshly baked bread without having to spend all day in the kitchen!
For tips on how to ensure the perfect crust, check out this resource on bread baking techniques.
Nutritional Facts for Small Batch Mini Baguette Bread
Understanding the nutritional profile of your food can truly enhance your cooking experience, especially when making something as delightful as small batch mini baguette bread. Here’s a quick look at what to expect:
Calories
One mini baguette typically contains around 150-200 calories, depending on the ingredients used. This makes it a versatile option for meals and snacks without too much guilt.
Protein Content
Each serving offers about 5-6 grams of protein, particularly when you opt for whole grain flour. This nutritional boost not only helps in muscle repair but also keeps you feeling full longer.
Sodium Levels
Sodium content is generally low, about 200-300 mg per baguette. This lower sodium level is a healthier choice for those monitoring their intake; a great way to savor your bread with fewer health concerns.
For more information about healthy eating, check out resources from Harvard Health, which can guide you on maintaining a balanced diet alongside delightful bread varieties like this one!
FAQs about Small Batch Mini Baguette Bread
How can I ensure my baguette turns out crusty?
Achieving that perfect crunchy crust on your small batch mini baguette bread is all about steam and temperature. Here are a few tips:
- Preheat your oven: Make sure your oven is hot—ideally around 450°F (232°C).
- Use a steam tray: Place a pan on the bottom rack while preheating, and add water to it right before you bake. The steam creates moisture that helps your crust develop beautifully.
- Bake longer at a higher temperature: If your baguettes need a little extra time, don’t be afraid to let them bake a few more minutes. That deep golden color indicates a well-cooked crust.
Can I freeze this bread?
Absolutely! Freezing your small batch mini baguette bread is a great way to ensure you always have fresh bread on hand. Just follow these steps:
- Cool completely: Make sure your baguettes are fully cooled to prevent condensation.
- Wrap tightly: Use plastic wrap or aluminum foil before placing them in a freezer-safe bag. This will help maintain their quality.
- Thaw when ready: When you’re ready to indulge, thaw them at room temperature or pop them in a preheated oven for a few minutes to restore their crustiness.
What should I do if my dough doesn’t rise?
If your dough isn’t rising, don’t stress—here’s what to check:
- Yeast freshness: Ensure your yeast is active. If it bubbles when mixed with warm water and a bit of sugar, you’re good to go!
- Temperature importance: Dough rises best in a warm, draft-free environment. Try placing it in an oven with just the light on or on top of your refrigerator.
- Kneading technique: Make sure you’ve kneaded your dough enough. A well-kneaded dough develops gluten, essential for rising.
For extra tips, checking out resources like King Arthur Baking or The Fresh Loaf can provide you with invaluable insights! Happy baking!
Conclusion on Small Batch Mini Baguette Bread
The joy of baking and sharing
There’s something magical about pulling freshly baked small batch mini baguette bread from your oven. The aroma fills your kitchen, inviting family and friends to gather around. It’s not just about the bread; it’s about the experience, the laughter, and the stories shared over each delectable slice. Plus, the satisfaction of creating something from scratch can’t be overstated.
Encouragement to try it out
If you’re hesitant, remember that trying your hand at baking doesn’t require a culinary degree. This recipe is approachable and forgiving—perfect for new bakers. Imagine surprising your loved ones with warm, crusty loaves or enjoying a solo snacker’s delight with some turkey bacon or chicken ham.
Final thoughts and next steps for the reader
So, why not roll up your sleeves and give this small batch mini baguette bread a whirl? You might just discover a new favorite weekend project. Check out resources like King Arthur Baking for tips and inspiration. Happy baking!
PrintSmall Batch Mini Baguette Bread: Easy, Fresh, and Homemade Delights

This small batch mini baguette recipe is perfect for those who crave fresh, homemade bread without the commitment of baking a large loaf. It’s simple, delicious, and satisfying.
- Prep Time: 15 minutes
- Cook Time: 25 minutes
- Total Time: 1 hour 40 minutes
- Yield: 4 mini baguettes
- Category: Bread
- Method: Baking
- Cuisine: French
- Diet: Vegetarian
Ingredients
- 2 cups all-purpose flour
- 1 teaspoon salt
- 1 teaspoon sugar
- 1 teaspoon instant yeast
- 3/4 cup warm water
Instructions
- In a mixing bowl, combine the flour, salt, sugar, and instant yeast.
- Add warm water and stir until a dough forms.
- Knead the dough on a floured surface for about 5 minutes.
- Let the dough rise in a warm place until doubled in size, about 1 hour.
- Punch down the dough and shape it into mini baguettes.
- Place the shaped baguettes on a baking sheet and let them rise again for 30 minutes.
- Bake in a preheated oven at 400°F (200°C) for 20-25 minutes, or until golden brown.
Notes
- For extra crustiness, place a pan of water in the oven while the bread bakes.
Nutrition
- Serving Size: 1 baguette
- Calories: 120
- Sugar: 1g
- Sodium: 150mg
- Fat: 0g
- Saturated Fat: 0g
- Unsaturated Fat: 0g
- Trans Fat: 0g
- Carbohydrates: 24g
- Fiber: 1g
- Protein: 4g
- Cholesterol: 0mg