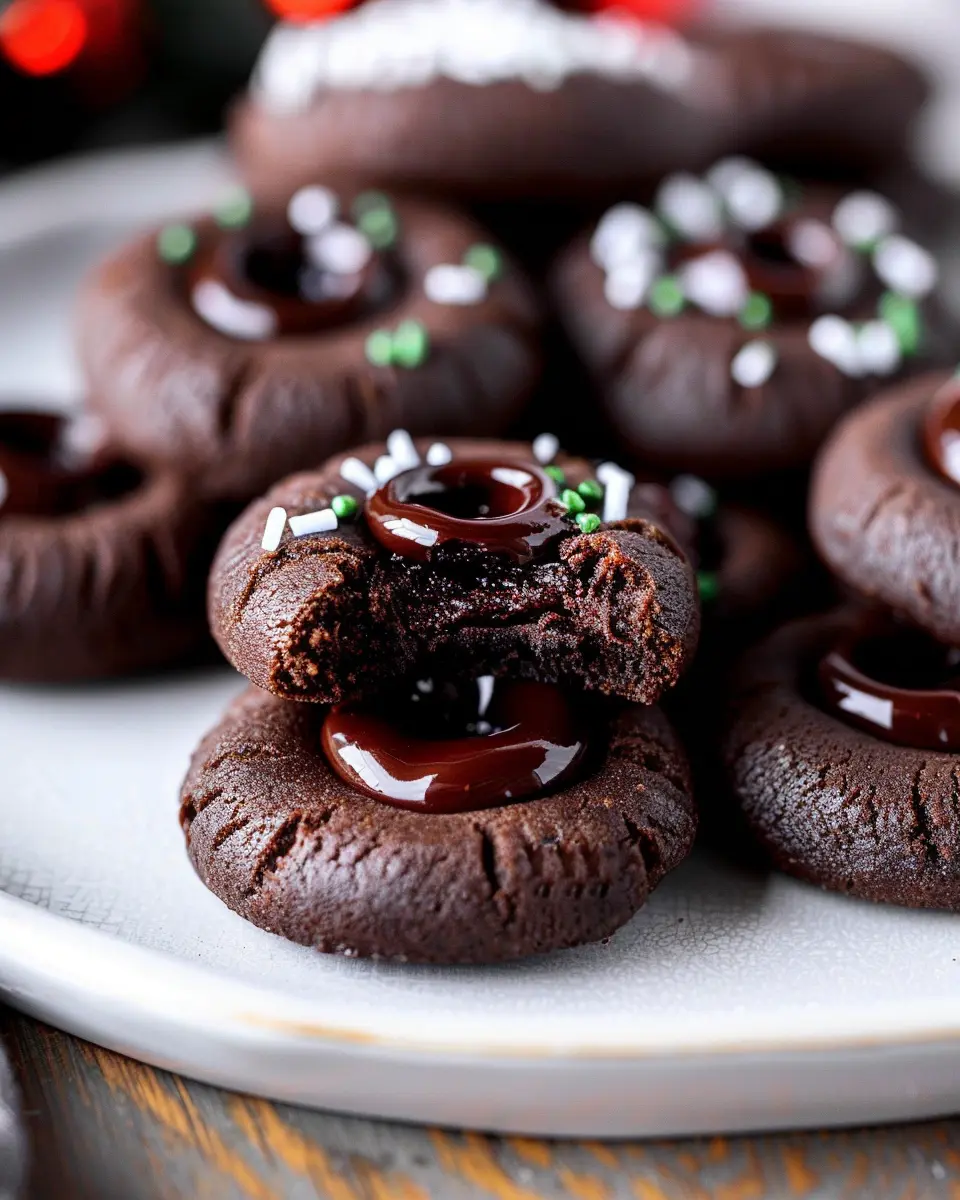
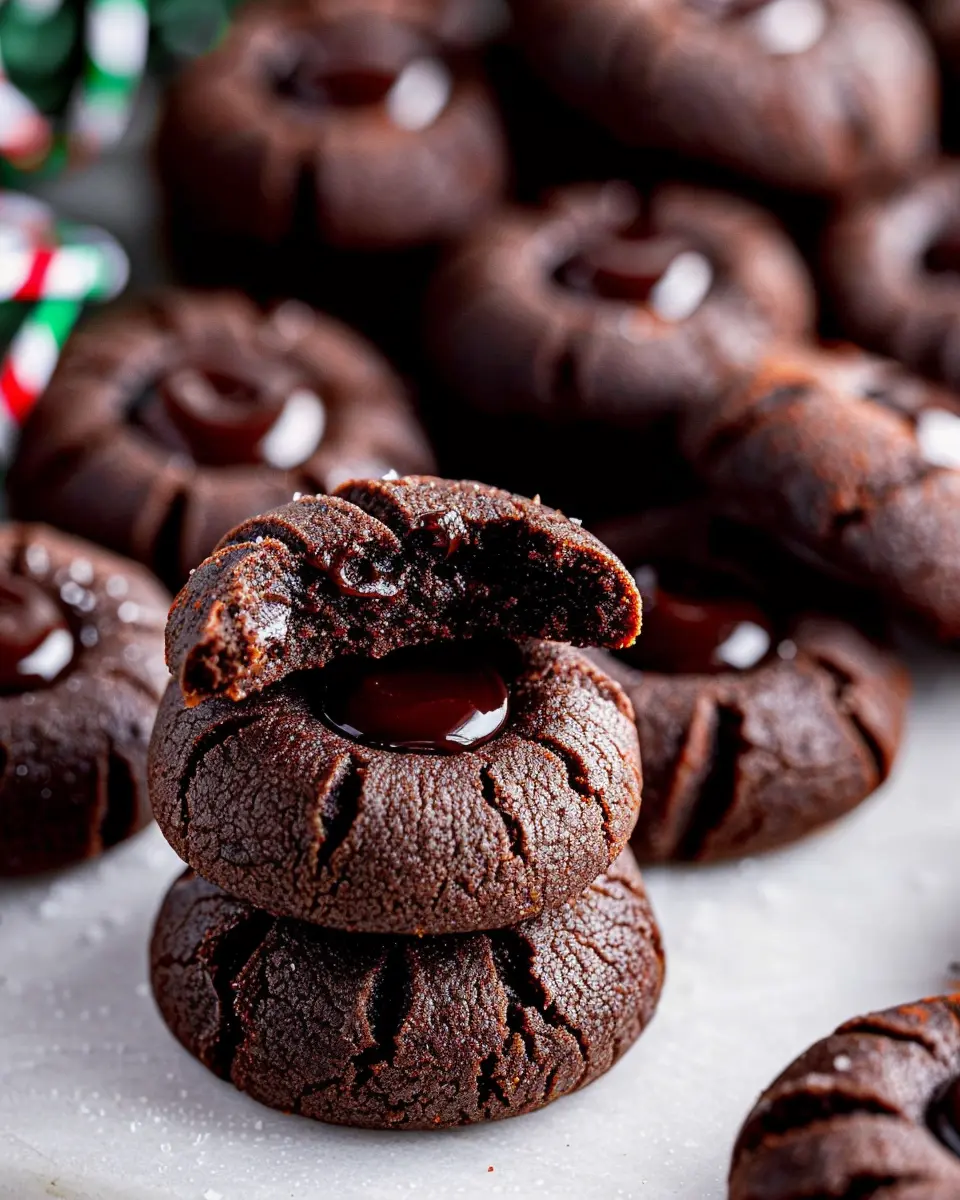
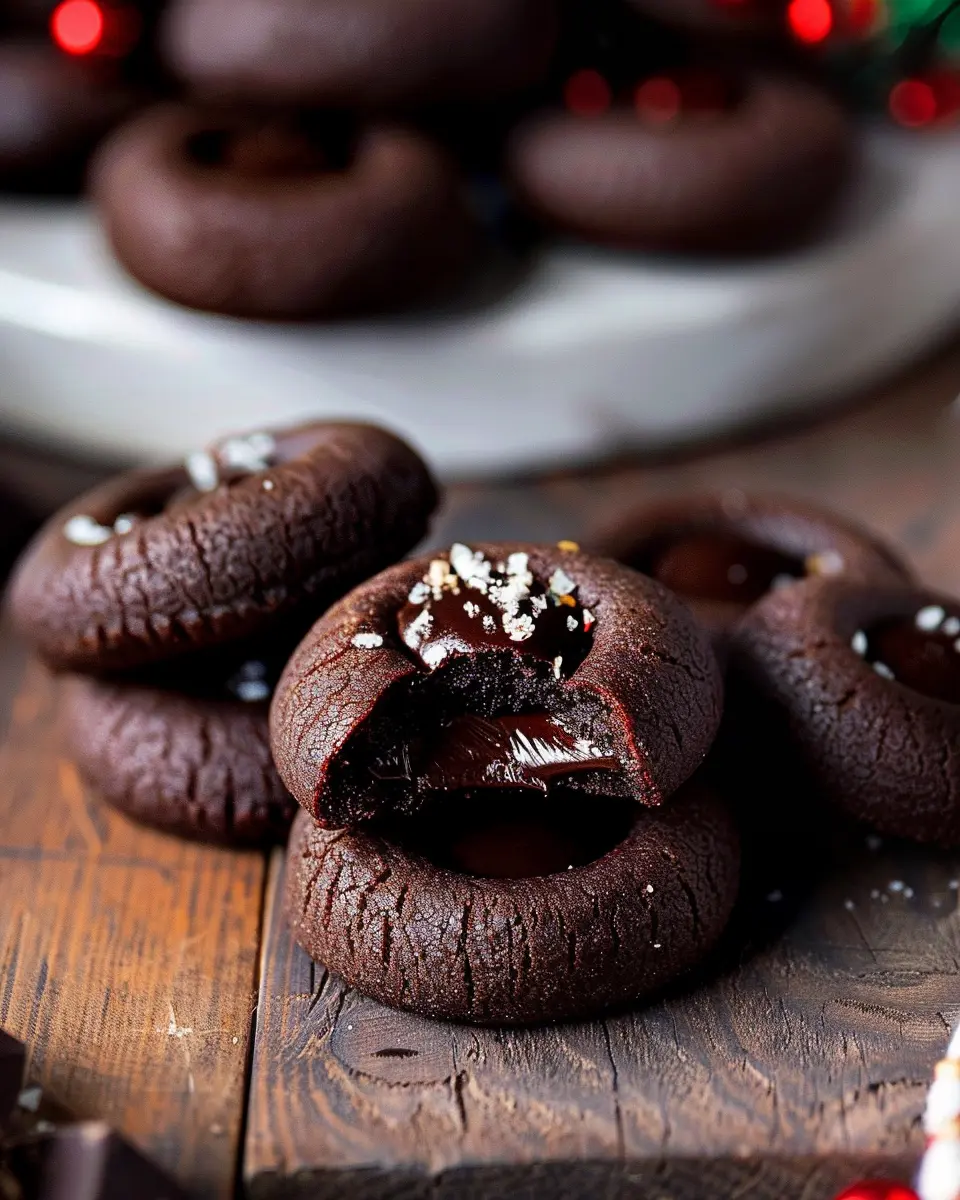
Introduction to Chocolate Thumbprint Cookies
When it comes to baking delectable homemade treats, few desserts manage to combine elegance and simplicity quite like chocolate thumbprint cookies. These delightful cookies are not only visually appealing but also incredibly versatile, which makes them a perfect choice for any occasion—from cozy gatherings to festive celebrations. If you’ve ever wondered why these cookies have captured the hearts of bakers and sweet tooths alike, let’s explore what makes them so special.
Why Chocolate Thumbprint Cookies are Ideal for Any Occasion
One of the most compelling reasons to whip up a batch of chocolate thumbprint cookies is their charming presentation. The little “thumbprints” create a natural indentation, inviting a filling of your choice—be it rich chocolate ganache, tangy raspberry jam, or creamy caramel. This versatility makes them a crowd-pleaser; everyone seems to have their preferred flavor pairing! Plus, the contrast of textures between the soft cookie and the gooey filling is simply irresistible.
In addition, the process of making these cookies can be a delightful experience. Rolling the dough into balls, creating the thumbprint, and watching the cookies puff up in the oven is incredibly satisfying. It’s also a great opportunity to engage friends or family in a fun baking session. Consider hosting a bake-off where everyone can customize their own cookie fillings. Not only will it yield delicious results, but you’ll also create lasting memories!
For those new to the kitchen, chocolate thumbprint cookies are beginner-friendly, requiring only simple ingredients like flour, sugar, and chocolate. Plus, they bake quickly, meaning you won’t be left waiting long to indulge. Have fun experimenting with various fillings or toppings to make the recipe your own!
Feeling inspired? You might want to check out this guide on baking essentials to enhance your baking skills! Getting started doesn’t have to be daunting.
In conclusion, chocolate thumbprint cookies are not just a treat; they are a canvas for creativity, an opportunity to bond, and a delicious bite of joy. Whether enjoyed alone or shared with friends, these cookies promise satisfaction in every bite!

Ingredients for Chocolate Thumbprint Cookies
When it comes to whipping up delicious Chocolate Thumbprint Cookies, having the right ingredients makes all the difference. Here’s what you’ll need:
- 1 cup unsalted butter (softened to room temperature)
- 2/3 cup granulated sugar
- 1 teaspoon vanilla extract
- 1 ¾ cups all-purpose flour
- ½ cup unsweetened cocoa powder
- ½ teaspoon baking powder
- ¼ teaspoon salt
- 1 cup chocolate chips (for the filling)
These ingredients create a rich, melt-in-your-mouth cookie that perfectly complements the jam or chocolate filling you choose to use. But don’t forget to use high-quality cocoa powder—it truly elevates the flavor of your Chocolate Thumbprint Cookies!
If you’re looking for tips on selecting the best butter or ways to store your cookies once they’re baked, you might find helpful insights in this baking guide. And if you’re curious about experimenting with different fillings, consider checking this list of scrumptious alternatives to suit your taste!
Step-by-Step Preparation for Chocolate Thumbprint Cookies
Making Chocolate Thumbprint Cookies is an enjoyable journey through the world of baking, where you’ll create delightful cookies filled with rich ganache. Follow these easy steps, and soon you’ll have a batch perfect for sharing—or indulging in all by yourself!
Gather Your Ingredients
Before diving into the baking process, make sure you have everything you need! Here’s a list of ingredients:
- 1 cup all-purpose flour
- 1/2 cup unsweetened cocoa powder
- 1/4 teaspoon baking powder
- 1/4 teaspoon salt
- 1/2 cup unsalted butter, softened
- 1/2 cup granulated sugar
- 1/4 cup brown sugar, packed
- 2 large egg yolks
- 1 teaspoon vanilla extract
- 1 cup chocolate chips (for the ganache)
Taking a moment to gather these ingredients can streamline your baking process and reduce those last-minute scrambles to the pantry.
Combine Dry Ingredients
In a mixing bowl, whisk together the flour, cocoa powder, baking powder, and salt. This step is crucial as it ensures the dry ingredients are uniformly mixed, leading to well-balanced cookies. If you’re looking for expert advice, mixing your dry ingredients separately is a best practice endorsed by many bakers, as it prevents clumps from forming and improves texture.
Cream Butter and Sugars
In a separate large bowl, use an electric mixer to cream together the softened butter, granulated sugar, and brown sugar until the mixture is light and fluffy. This should take about 2-3 minutes. You’ll notice the transformation in texture, which is vital for achieving that lovely cookie base. The sugar’s granules create little air pockets, contributing to the cookie’s lightness.
Mix in Egg Yolks and Vanilla
Next, beat in the egg yolks one at a time, followed by the vanilla extract. The egg yolks will help to bind the dough and add richness. Stir until all ingredients are well-combined, and don’t hesitate to taste a bit of the mixture for a little quality control!
Form Dough Balls
Using your hands, scoop out portions of dough—about a tablespoon each—and roll them into balls. Place them on a baking sheet lined with parchment paper. Remember, the size of your dough balls influences the final product, so keep them uniform for even baking.
Create Indents in Dough
Here comes the fun part! With your thumb (or the back of a spoon), gently press down in the center of each dough ball to create an indent. This is where your chocolate ganache will eventually go, so make sure the indentation is deep enough to hold the sweet filling!
Chill the Dough
Once the indents are made, place your baking sheet in the refrigerator for at least 30 minutes. Chilling the dough solidifies the butter, making your cookies less likely to spread while baking. This step can be tempting to skip, but trust me—it’s worth it for better texture and shape.
Bake the Cookies
Preheat your oven to 350°F (175°C) during the chilling time. When the dough is sufficiently chilled, take the baking sheet out and pop the cookies into the oven. Bake for about 10-12 minutes, or until the edges look firm but the center seems a tad soft. Your kitchen will fill with a delightful aroma that will have everyone asking what you’ve been baking!
Prepare the Ganache
While the cookies are baking, it’s the perfect time to prepare the ganache. In a microwave-safe bowl, heat the chocolate chips in 30-second intervals, stirring in between until melted and smooth. If you want a creamier ganache, consider adding a splash of heavy cream or coconut cream for a richer texture.
Assemble Cookies with Ganache
Once the cookies are out of the oven and cooled slightly, carefully fill each thumbprint with the prepared ganache. Allow the ganache to set for a few minutes before serving. You might find it hard to resist tasting a warm cookie right away—who could blame you? The combination of the chocolate cookie and rich ganache is simply irresistible.
Now that you have your Chocolate Thumbprint Cookies baked and beautifully assembled, get ready to share—or enjoy them all yourself! They make a perfect treat for gatherings, or simply as a sweet pick-me-up during the week. Happy baking!
Variations on Chocolate Thumbprint Cookies
Chocolate thumbprint cookies are a delightful treat, but why stop at the classic? Let’s explore some fun and tasty variations that will keep your baking game fresh and exciting!
Nutty Chocolate Thumbprint Cookies
For a delightful crunch and a rich flavor, consider adding your favorite nuts to the dough. You can use chopped walnuts, pecans, or even hazelnuts. Just fold them into your chocolate thumbprint cookie mixture before baking. Not only do they add texture, but they also bring a depth of flavor that pairs beautifully with chocolate. If you want to elevate it further, try using nut butters like almond or peanut butter in place of some of the butter in the recipe—this will create an incredibly rich variation that nut lovers will devour!
Seasonal Flavors for Thumbprint Cookies
Take advantage of seasonal ingredients to give your chocolate thumbprint cookies a twist! For fall, incorporate pumpkin spice into the dough or fill your thumbprints with pumpkin butter. During the holidays, a touch of peppermint extract in the dough and crushed peppermint candies on top can make for festive cookies perfect for sharing at gatherings.
Spring brings delightful options, such as filling with lemon curd or a berry jam, encapsulating the essence of the season. Don’t forget summer—think of refreshing fillings like passion fruit curd or coconut cream for a tropical spin.
Experimenting with fillings can turn these cookies into something extraordinary, making them perfect for any occasion. Are you feeling adventurous? Check out these popular fillings that can resonate with various flavors!
Whether you stick to classic chocolate or venture out with nuts and seasonal flavors, your chocolate thumbprint cookies will surely impress! Keep your creativity flowing, and don’t hesitate to blend flavors inspired by your own culinary interests!
Cooking Tips and Notes for Chocolate Thumbprint Cookies
When it comes to baking Chocolate Thumbprint Cookies, there are some essential tips to ensure your cookies turn out beautifully crispy on the outside and chewy on the inside.
Perfecting the Dough
- Chill the Dough: After mixing, let the dough chill for at least 30 minutes. This helps the cookies maintain their shape while baking. Chilling is crucial to avoid spreading too much in the oven.
- Don’t Overmix: When combining the wet and dry ingredients, mix just until combined. Overmixing can lead to tough cookies rather than the tender bites you’re aiming for.
Filling Options
- Explore Fillings: While traditional chocolate ganache is delicious, try other fillings like peanut butter, raspberry jam, or even caramel. Each adds a unique twist, and you can even mix and match!
- Proper Sizing: Use a teaspoon to create uniform thumbprints in the dough. The size of the indentation matters for an even filling distribution.
Baking Time
- Monitor Closely: Keep an eye on your cookies when baking. They should look set but still soft in the center. Every oven is different, so start checking a minute or two before the recommended baking time.
By implementing these simple tricks, you’re not just making cookies; you’re crafting an experience! For additional tips on common baking mistakes to avoid, check out articles from sources like King Arthur Baking for expert advice. Happy baking!
Serving Suggestions for Chocolate Thumbprint Cookies
When it comes to enjoying Chocolate Thumbprint Cookies, the possibilities are as delicious as they are diverse! These delightful treats are versatile enough to pair with various beverages and serve at different occasions.
Pairing Beverages
- Coffee: The rich flavor of a freshly brewed cup enhances the chocolate, making it the perfect afternoon snack.
- Tea: A soothing herbal tea can provide a lovely contrast to the sweetness, creating a balanced palate.
- Milk: Classic and comforting, a glass of cold milk complements the cookies beautifully, creating a nostalgic experience.
Presentation Ideas
Serve your Chocolate Thumbprint Cookies on a decorative platter or tiered stand for a touch of elegance at gatherings. Or, for a fun twist, package them in decorative bags tied with ribbons as personalized gifts for friends and family.
Special Occasions
Whether for a holiday gathering, a cozy movie night, or an office treat, these cookies never fail to impress. Want to elevate your cookie game even more? Consider top spreads like almond butter or peanut butter for an added flavor kick!
For more serving ideas and the science behind pairing flavors, explore resources from The Spruce Eats or check out Epicurious for inspiration!
Time Breakdown for Making Chocolate Thumbprint Cookies
Creating the perfect batch of Chocolate Thumbprint Cookies is not just about taste, but also timing. Let’s break down the process to help you plan your baking adventure seamlessly!
Preparation Time
Start by gathering your ingredients and equipment—this will take about 15 minutes. Ensure you have all the essentials: flour, cocoa powder, sugar, and your favorite jam for the thumbprint filling.
Chill Time
After the dough is mixed, let it chill in the fridge for about 30 minutes. This step is crucial, as it helps the cookies maintain their shape while baking. Perfectly timed chilling makes all the difference!
Baking Time
Now for the fun part—baking! Your Chocolate Thumbprint Cookies will need roughly 12-15 minutes in the oven. The lovely aroma that fills your kitchen will be a delightful preview of what’s to come.
Total Time
All in all, from prep to the moment you pull those heavenly cookies from the oven, you’re looking at a total time of around 1 hour. Not bad for a delicious treat! For some additional baking tips and tricks, check out this comprehensive baking guide. Enjoy every crumb!
Nutritional Facts for Chocolate Thumbprint Cookies
When you indulge in Chocolate Thumbprint Cookies, it’s nice to know what you’re treating yourself to. Here’s a breakdown of their nutritional content:
Calories
Each cookie holds about 100-120 calories, making them a delightful yet moderate treat. If you’re watching your intake, just keep this in mind for portion control!
Total Carbohydrates
A typical cookie contains around 14-18 grams of total carbohydrates. These cookies provide a wonderful energy boost, perfect for a midday snack or dessert.
Sugars
You can expect about 8-10 grams of sugar per cookie. While it’s always good to enjoy sweets in moderation, these Chocolate Thumbprint Cookies can satisfy your sweet tooth without going overboard.
For more detailed nutritional insights, you might find resources like MyFitnessPal helpful! Understanding the components of your treats can enhance your baking experience.
FAQs about Chocolate Thumbprint Cookies
How do I store leftover thumbprint cookies?
Storing your Chocolate Thumbprint Cookies properly is essential to keeping them fresh and delicious. You can easily store them in an airtight container at room temperature for up to 5 days. If you want to extend their shelf life, consider refrigerating them, where they can last up to two weeks. Just keep in mind that cold cookies may be a bit firmer, so you might want to let them sit at room temperature for a few minutes before diving in.
Can I use dark chocolate for the ganache?
Absolutely! Using dark chocolate for the ganache can add a rich, intense flavor to your Chocolate Thumbprint Cookies. It’s a fantastic way to elevate the cookies, especially if you’re a fan of deep, chocolatey tastes. Just remember to adjust the sweetness in the dough if your dark chocolate is particularly bittersweet — you want that perfect balance of flavors.
Are there any gluten-free alternatives for the recipe?
Yes, there are several great gluten-free alternatives you can use! Consider substituting regular flour with a 1:1 gluten-free flour blend, which usually contains a mix of rice flour, tapioca starch, and potato flour. For a nutty twist, you can also try almond flour, though it may yield a slightly different texture. Always check labels to ensure products are certified gluten-free if you’re baking for someone with celiac disease or severe gluten sensitivity.
For more tips on gluten-free baking, check out Gluten-Free Recipes for additional guidance and inspiration! Happy baking!
Conclusion on Chocolate Thumbprint Cookies
When it comes to indulgent yet simple treats, Chocolate Thumbprint Cookies are truly exceptional. They offer a delightful blend of rich chocolate and the unique texture of a soft cookie. Whether you’re making them for a special occasion or just because, these cookies are sure to impress.
Consider experimenting with different fillings—perhaps a creamy peanut butter or fruity jam could be a hit! Sharing this treat with friends makes it even better. You might make someone’s day by giving them a batch. If you want more inspiration, don’t forget to check out this fantastic collection of cookie recipes! Enjoy your baking adventure!
PrintChocolate Thumbprint Cookies: The Best Indulgent Treat You’ll Bake

Chocolate thumbprint cookies are a rich and indulgent treat that will satisfy your sweet tooth. These cookies are perfect for any occasion!
- Prep Time: 30 minutes
- Cook Time: 15 minutes
- Total Time: 45 minutes
- Yield: 24 cookies
- Category: Dessert
- Method: Baking
- Cuisine: American
- Diet: Vegetarian
Ingredients
- 1 cup unsalted butter, softened
- 1 cup granulated sugar
- 1 teaspoon vanilla extract
- 2 cups all-purpose flour
- 1/2 cup unsweetened cocoa powder
- 1/4 teaspoon salt
- 1 cup chocolate chips
Instructions
- Preheat your oven to 350°F (175°C).
- In a large bowl, cream together the butter and sugar until smooth.
- Mix in the vanilla.
- In a separate bowl, combine the flour, cocoa powder, and salt.
- Gradually add the dry ingredients to the butter mixture until just combined.
- Roll the dough into 1-inch balls and place on a baking sheet.
- Make an indentation in the center of each ball using your thumb.
- Fill each indentation with chocolate chips.
- Bake for 12-15 minutes.
- Allow to cool before serving.
Notes
- For best results, chill the dough for 30 minutes before baking.
- Replace chocolate chips with your favorite jam for a fruity variation.
Nutrition
- Serving Size: 1 cookie
- Calories: 120
- Sugar: 8g
- Sodium: 50mg
- Fat: 7g
- Saturated Fat: 4g
- Unsaturated Fat: 3g
- Trans Fat: 0g
- Carbohydrates: 15g
- Fiber: 1g
- Protein: 1g
- Cholesterol: 30mg